Warung Bebas

Monday, June 30, 2014

Whatsapp::15 Best Whatsapp Tricks and Tips

Whatsapp::15 Best Whatsapp  Tricks  and  Tips

Whats app Messenger can be used to send pictures, videos, maps, audio or texts to anyone anywhere around the world free of cost. Only there has to be data connection by network provider or WI-Fi device.

Now a lot of people have a tendency to know about various tricks regarding any app. So there are many
Whats app Tips and trick as well.So Here are few of those WhatsApp TIPS AND TRICK

BELOW ARE 15 WHATSAPP TIPS AND TRICKS

1. There is a way to spy on someone else’s account in Whatsapp. All it needs to be done is that the Settings of the rooted phone have to be opened. Then the MAC address of phone’s Wi-Fi has to be noted.

2. There is a trick to use Whatsapp without using a person’s number, this is done by tricking the verification request which is asked after installation of Whatsapp.

3. The messages deleted by someone can be obtained by transferring the msgstore.db.crypt file to some other phone and restored in other phone’s Whatsapp.

4. By using an app called Magiapp, one picture can be sent to another picture.

5. Whatsapp does not allow anyone to download the profile pictures of others for different security reason, but actually these are automatically downloaded when one sees it, on the memory card.

6. Those who love to prank, there is an app for creating fake conversation. It is done with the help of Whatssaid.

7. There is a way to prank friends by changing their profile picture on a particular phone. A pictures’ name and resolution has to be changed and saved on phone.

8. With Cloud Send, people can share PDF, APK, ZIP and DOC file on Whatsapp.


9. With the help of Whatsapp plus, profile picture can be hidden or stopped from being downloaded.

10. The Last seen feature of Whatsapp can be blocked by installing the Block Whatsapp last seen app.

11. The automatic image download can be disabled by installing Whatsapp plus app.

12. The Whatsapp free validation can be extended up to 2022 by installing Whatsapp with a number in two different phones, one iPhone and one android alternatively once.

13. Multiple Whatsapp account can be maintained in a single rooted phone with SwitchMe multiple accounts app.

14. Whatsapp can be used without SIM using the WLAN connection on phone.

15. Whatsapp conversation can be hacked using Whatsapp Sniffer.


WhatsApp::Whatsapp Lock for Android.

WhatsApp::Whatsapp Lock for Android.

This app will lets you protect your WhatsApp privacy through a PIN.

After process installation it will ask you to insert a 4 digit PIN, and will show the configuration options to lock WhatsApp

You can customize auto-lock time, so you do not need to enter the PIN every time you change task on your device .

If you may enter a wrong pin and your phone has front camera, it will take a picture of the intruder within a very short of time and saved in the photo gallery.

Have fun in detecting the intruder {Only devices with front camera}

★ It's free and it  has no limitations.

★ It keep your messages safe

★ It Capture intruders when wrong PIN entered. 

★ Customize autolock time

★ Do not make you crazy with strange advertising.

★ It is ultra lightweight. Uses low resources and space.

★ Minimun special permissions required

★ Design attractive and simple user interface.

NOTE THAT: This application is not related to Whatsapp Inc.

Saturday, June 28, 2014

WHATSAPP::How to install WhatsApp on PC/laptop

How to install  WhatsApp  on PC/laptop
Most of the phones now days are using WhatsApp as one of the most used App. But now you can also use it in PC. This will not require for you to carry your phone at any time. You can enjoy its features in your PC or Laptop.

You can install WhatsApp using Youwave, another great application to run Android Apps on PC. You will be able to download various Android Apps with it. This application offers you the latest edition Android ICS 4.0.4. You can also download Android free games with this App. This software also let you to import application to run in it. Youwave is not a free software, but you will get 10 days free trial.

You will require minimum Intel Pentium 1.6 GHz CPU, 1.5GB DRAM, 500MB disk space. And windows XP,Vista, windows 7, windows 8, 32/64 bits.


STEPS TO FOLLOW

1.download Youwave and Install now.

2. Run Youwave to open it Click view then Online content.

3. Double click on online app {WhatsApp} to Install or browse the store.

4. Now after the download, click view-apps. And double click to install WhatsApp.

Finally you are done now with this simple steps to install WhatsApp.Then  Double-click to launch the WhatsApp in your PC or Laptop.

Now choose to Agree and continue. After that follow the steps as the same thing you do on cell-phone. You have to give your country code and phone number .

After you finish all this things import all your contact in PC  and are ready to go live. You can have the fun with your WhatsApp now.

WHATS APP::How to Create a Shortcuts for Important Contacts

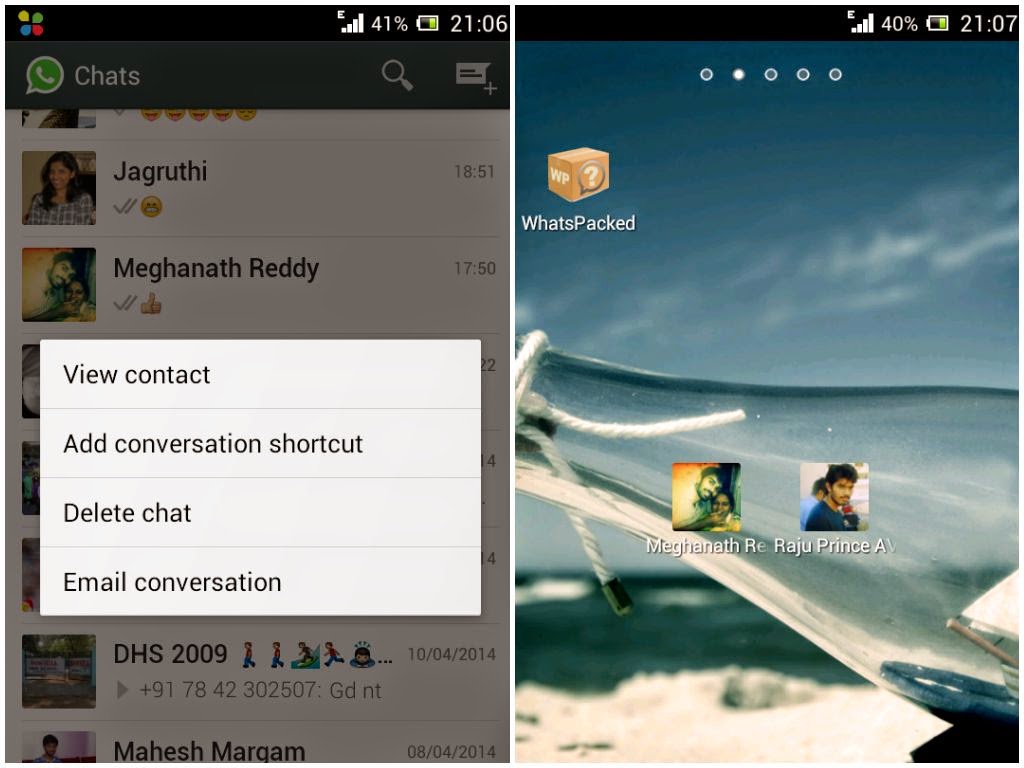
Here is a simple trick on how to create a shortcut for Whats App contacts. when using Android phones you can easily create a shortcut for a Group or a Contact by having a long press on it. A tab will pop up and then select add conversation shortcut.A shortcut will be created for any contact or group.

 WHATS APP

But it is not easy in case of IOS so for that you need to install a third party application which called 1TapWA to get this feature. This app also has some extra features like photo editing and action scheduler.

WHATS APP::Change Your Mobile Number on WhatsApp without losing any chat history.

Do you want to change your SIM Card and then continue with the same Phone there is no need to uninstall and reinstall Whats App to change Whats App number.

Change  Your Mobile  Number on WhatsApp without  losing any  chat history.

There is a default option available on Whats App to change mobile numbers. For that go to Settings then Account and Change number. Enter both old and new phone numbers and click Done.
Now you already verify your new number all the Groups, messages will be migrated to your new Phone number.

WHATS APP::How toHide your Mobile number in WhatsApp Groups.

How toHide your Mobile number in WhatsApp Groups

If you want to keep your mobile number disclose to others in whats app then this is simple trick for you.
Follow the steps below.

1. First of all you need to uninstall and reinstall WhatsApp on your Android Phone.

2. In the step of verification,you have to put your mobile in flight mode or change the message center number.

3. Select Verify through sms and enter your email id and then Click on send. Now Without wasting a second, click on Cancel. This will terminates the authorization process.

4. Now you have to spoof that message, for that download Spoof Text message.

5. Now go to your Outbox and then Copy the message details of Spoof App then send it to Spoofed Verification

6. Use the below details
To: +447900347295
From: +(Country code)(mobile number)
Message: Enter you email id

Now a message will be sent through that spoofed number and that Spoofed number is visible to all others instead of your original mobile number.

Thursday, June 26, 2014

how to Format s60 Phones

how to Format  s60  Phones
You can quick format your phone and you can full format.
To quick format goto tools/ settings/general resore Factory Settings. To full format go on standby scree and put in this code: *#7370#
this will leave you with nothing on your phone except nokia
software. I will advise you keeP your phone on charge while
doing this in case of not finishing its re-format.
A Soft-reset - the process of resetting all the settings of the
phone to the factory default No applications are deleted! A
Hard-reset is like formatting a drive It does format the
memory. Everything that has been
installed after the first use of the phone is deleted!
It will recover the memory of the phone to the state you
purchased iT

Tuesday, June 24, 2014

5 Steps on How to protect your cell-phone from viruses / MOBILE PHONE TIPS AND TRICKS

5 Steps on How to protect your cell-phone from viruses / MOBILE PHONE TIPS AND TRICKS

1. Always keep your Bluetooth off unless required or it is most preferable to keep your handset to hidden mode unless you need it to be visible.

2. When you have forgotten to switch-off your Bluetooth  remember not to open any Bluetooth messages or files sent by unknown source they are most likely viruses.

3. Only download content from trusted sources, trusted sources include operator portals and other well-known websites that offer adequate protection against viruses.

4. Always install an anti-virus software in your phone do not forget to keep it updated as new viruses and threats always arise.

5. Never lend your memory card to anyone. It might get infected if the person to whom you have lent you MMC has infected his phone and he/she inserts your card in his phone. Also remember not to insert someone else's MMC in your handset since there are chances of his MMC containing a virus or malware.

Steps on how to repair and fix a water damaged mobile phone / MOBILE PHONE TIPS AND TRICKS

Steps on how  to repair and fix a water damaged mobile phone / MOBILE PHONE TIPS AND TRICKS

1. First remove the battery immediately and do not try to switch off the handset. NOTE. The removing of the battery is a must

2. Now dismantle your cell phone carefully. To open your cell phone you need a torx T6 size screw driver and a tweezers. You have to remember the steps how you opened the phone as you will have to assemble it later

3. Dry the circuit board carefully and completely using a hair drier or you can also dry it in sunlight.

4. Dry the spare parts and components carefully and be careful with the LCD as it is very delicate.

5. Clean the circuit board with spirit using a brush this will prevents corrosion on the PCB.

Now reassemble your mobile phone carefully and if all goes well your mobile phone should switch on without any problem. If it fails to switch on you may charge your handset and try it again and if it does not switch on now you will have to get your phone repaired at a service center.

Acer V 750 secret codes / ACER / MOBILE PHONE TIPS AND TRICKS

Acer V 750  secret  codes  / ACER / MOBILE PHONE TIPS AND TRICKS

*#400# Display Adc/ Set Cal-Value

*#402# Set LCD Contrast

*#403# Display Errors Info

*#300# Display Info Hw and Sw

*#301# Menu Test

*#302# Menu Acoustics

*#303# {Settings saved} Set English language

*#307# Menu Engineering

*#311# Reset Phone Code  [ Also reset Security Codes  ]

Saturday, June 21, 2014

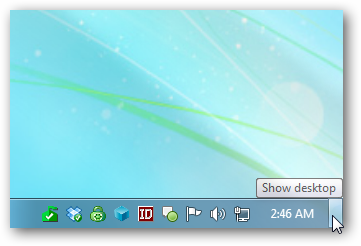
How to Make Icons Display More Quickly on the Taskbar ..!!

How to Make Icons Display More Quickly on the Taskbar ..!!
The task bar provides a simple shortcuts to most used items and allowing user to simply click on an icon and open the associated program. When you hover your mouse over an icon, you can easily see what that icon is and what it does.

Unfortunately  those descriptions can be slow to appear sometimes and that can reduce your productivity and increase the amount of time it takes to open your programs. If you are having this kind of problem  you can tweak Windows 7 to make those thumbnail descriptions display much more quickly. Just follow these simple steps to make the taskbar easy and more useful.

Click Start button and type regedit in the Search box. This will open the Windows Registry. NOTE THAT:: you should always back up the registry before you make any changes.

Navigate the registry and go to the HKEY_CURRENT_USER\Control Panel\Mouse section Highlight the Mouse Hover Time setting and double-click it.

Lower the number in the box to display the thumbnails easily and more quickly. The default setting is 400 milliseconds, but also you can choose any number you wish – 150 milliseconds is a good one.

After you are done making the change  simply click the red X to close the registry editor and see the results of your tweak.

How to Format Your Hard Drive in Windows 7/ WINDOWS 7

How to Format Your Hard Drive in Windows 7/ WINDOWS 7

If you are running Windows 7 and you need to format the hard drive that it is installed on You need to follow these simple steps below you should know that formatting your hard drive you will delete all of the files, folders and other documents or programs that are installed, NOTE THAT:: its batter to back up all your system before you start the process.

STEPS TO FOLLOW

Open the Windows 7 Disk Management Utility and locate the drive in which you want to format. If you do not see your hard drive listed in the box or you get an Initialize Disk window you most likely have not partitioned the hard drive yet.

You will need to partition the hard drive before you will be able to continue, so if you get this message, partition the drive then come back to the next step once completed.

With the drive located that is to be formatted, right click and select Format

Be sure you have the correct drive selected before you start the formatting process once it begins there is no way to retrieve the information.


In the Volume Label you will need to assign your drive a name by default Windows 7 will name the drive New Volume If you are using this drive for something specific such as movies or animation files name it easy name to remember

Click NTSF for the file system

Set your Allocation unit size to Default unless you have a specific reason to customize it.

Uncheck the perform a quick format in order to do a standard full format.

Be sure that the Enable file and folder compression box is unchecked.

Click Ok at the bottom of the window then Ok again to begin the formatting process.

The formatting process can take a long time depends on the size of your hard disk it take a few seconds to format a 2GB and a couple of hours to format a 2T drive.

Once the format reaches hundred percent the status change to Healthy . The hard drive once formatted completely will be ready to install with a new operating system and begin using it to store different files, folders and run programs.

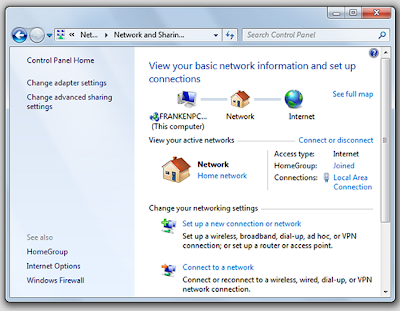
How to Set Up a New Wireless connection in windows 7 / WINDOWS 7.

How  to  Set  Up a  New Wireless connection in windows 7 / WINDOWS 7.
WINDOWS 7

Setting up a new wireless connection on your Windows 7 laptop allows you to work from anywhere you can get a signal. That makes it easier to get things done, no matter where you need to move within your home or office.
Windows 7 makes it easy to set up a connection to an existing wireless network. Just follow the steps outlined below.
1. Click the Start button
2. Then Control Panel from the menu
3. Click Manage Wireless Networks icon and choose Add
4. Choose Manually create a network profile
5. Enter the name, security type and type of encryption for your wireless network
6. Click Next then select Change connection settings
7. Go to the Security tab and set the network authentication method used on your wireless network
8. Uncheck the box that says Remember my credentials  unless you want the laptop to retain those settings
9. Click OK to confirm your settings
When you click OK, the laptop should automatically try to connect to your wireless network. Contact the systems administrator at your workplace or the technical support number for your ISP if the network doesn't connect after a few minutes. If you are connecting through a DSL or cable modem and wireless router, you might want to power cycle both devices prior to calling for service. Resetting the modem and router often resolves problems with wireless networking.

How to Take a Screenshot With WINDOWS XP, WINDOWS 7..!! /WINDOWS TRICK

http://technologifix.blogspot.com/

Start by identifying the print screen key on your keyboard. normally located somewhere near the backspace button or function keys it will be labeled PrtScr, prt scr, PRTSCR, or PRTSCR. If your keyboard does not have a print screen button consult your laptop or mobile device manual for the appropriate key combination to capture the screen.

To take a screenshot of the entire screen  simply press the Alt+ PrtScr button. To capture an active window, press Alt + PrtScn.you should know that before you can paste or edit your screen capture you will need to save it onto Paint or any image editing program.

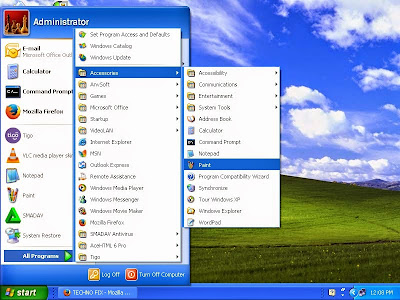
To perform this, click on the Start button in the bottom left corner of your screen. Then select All Programs and then Accessories.>>- click on Paint. This will open up your Paint program. Alternatively, you can type Paint into the search bar at the bottom of the Start menu, and then select the program when it appears.

Once Paint is open, find the Clipboard icon. From the menu you can click on Paste or Ctrl+V. This will paste the captured image onto the Paint window. From here, you can resize the image by clicking on Resize from the image group. You can enter a new pixel size or percentage from this screen. Once you have manipulated the image to a size you want, click Save to name your image
.

How to Set Up a Home Wireless Network on WINDOW 7,WINDOWS XP or WINDOW Vista


Wireless Internet has become the standard for new home networks. Advancements in networking over the past twenty years have provided the ability for more than one PC in a home to connect to the Internet at a time. Wireless networks also allow users to connect from anywhere within range of the router’s reach, giving users the luxury of surfing from their favorite spot on the couch.
Setting up a home wireless network is very easier. below are 9 steps to follow.

1. Check that your computer’s operating system supports wireless networking.
The new Windows 7 operating system comes prepared to support wireless networking. Windows Vista and Windows XP users will be able to set up a wireless network, but it is recommended that users first consult Microsoft’s homepage and download the applicable service packs in order to make the process easier. These updates should be free if you already have the operating system installed.

2. Sign up for broadband Internet service.
Many Internet service providers (ISPs) will provide wireless options such as Digital Subscriber Line (DSL) or cable internet. They are generally sold on a monthly subscription basis.

3. Purchase a wireless router, DSL modem, or cable modem.
Check with your ISP as they may provide this as part of your subscription fees.


4.Here Plug one end of a network cable into your modem to connect it to the port labeled Internet, WAN, or WLAN on your router.
Some new modem models come with networking technology built in. Make sure that the router and modem are turned off when you connect them. Once connected, turn on both devices.

5. Connect your computer to an open network port on your router.
Your computer will not stay directly connected to the router  but this step is importance in order to set up the network. Make sure that do not to plug your computer into the Internet port, WAN port or WLAN port. If your computer is turned on it should automatically recognize the router and establish a connection.

6. Enter the URL indicated in the router’s packaging to configure your router.
A lot of routers have different instructions for this configuration so follow the directions that accompany your model.

7. Establish your network name and security settings.
You can decide whether to add password to protect your connection or not.

8. Disconnect your computer from the modem.
Your wireless internet should now be correctly configured and ready to use.

9. Connect your other computers, printers and gaming systems to the network.
This should be as easy as following the device’s configuration settings and selecting your established network. Consult your device’s specific instructions, as necessary.
By following those simple steps your home wireless network will be running in any time.

Tuesday, June 17, 2014

boot window xp fast


Just follow steps below:

1. Open notepad.exe, type

del c:\windows\prefetch\ntosboot-*.* /q

save as "ntosboot.bat" in c:\ drive

2. From the Start menu, select "Run" and type "gpedit.msc"..

3. Double click "Windows Settings" under "Computer Configuration" and double click again on "Shutdown" in the right window.

4. In the new window, click "add", "Browse", locate your "ntosboot.bat" file & click "Open".

5. Click "OK", "Apply" and "OK" once again to exit.

6. From the Start menu, select "Run" and type "devmgmt.msc".

7. Double click on "IDE ATA/ATAPI controllers"

8. Right click on "Primary IDE Channel" and select "Properties".

9. Select the "Advanced Settings" tab then on the device or 1 that doesn't have 'device type' greyed out select 'none' instead of 'autodetect' and click "OK".

10. Right click on "Secondary IDE channel", select "Properties" and repeat step 9.

11. Reboot your computer.

iPhone Secret Codes

iPhone Secret Codes

Similarly Apple iPhone Smartphone’s operating system iOS also have some secret codes for multiple purposes like easy access to setting Now I'm going to share some of them with you guys hopefully you will find them useful.

*#06# Show IMEI of any phone means it will work on any Smartphone or mobile of any brand.

*#21# Information about the configuration of forwarding calls, voice and data.

*#30# Functions is to report you either you enable or disabled status of calling line presentation.

*#33# List with multiple configurations like call, sms, data, fax, sms and show whether they are enabled or not.

*#43# Verify status of call waiting like sms, data, sync data, etc. in your iPhone

*#61# Checking of number of missed calls.

*#62# Verifies the number for forwarding calls in case of none of service is available.

*#67# Check the numbers for forwarding calls if your iPhone is busy.

*#76# Information about your line presentation enabled or disabled status.

*225# Prepaid line

*777# Detailed information of account balance of prepaid iPhones

*3282# Get know about the use of data information.

*3001#12345#* Reveal internal setting like Open the "Field Test" of the iPhone which enables us to learn many advanced data network from our iPhone. GSM, Wireless, 3G ... everything will be exposed here.

These codes are applicable to all models of Apple iphone like 1, 3G, 3GS, 4, 4S and 5

Saturday, June 14, 2014

Blackberry mobile phone Secret Codes..!! / BLACKBERRY


For those of you who already use BlackBerry as a multimedia communications device and you, not hurt you to try using the command codes that you can use to check a wide range of features available in this

smartphone.Here's a secret command codes that can be used :

* # 0 6 # Know the IMEI for Blackberry

ALT + NMLL Know the capacity of the signal bar

ALT + V A L D Verification Address Book

ALT + R B L D Remodel Address Book

ALT + RBV See source code in a Webpage

ALT + left Shift + press H Know technical info is in Blackberry

ALT + Right Shift + Delete Know the simulation capacity of the battery is full

ALT + log LGLG Know that has been done in Blackberry

ALT + NUM / Aa / Cap + H Aware information access PIN - IMEI - Vendor ID - Free Memory - Version OS
MEPD on Sim Card Check the status of Blackberry locked or unlocked

ALT + Cap / Aa = Right + DEL Restart the Blackberry is being hangs

ALT-SMON WLAN Wizard screen Enable simulated Wizard mode

ALT-SMOF WLAN Wizard screen Disable simulated Wizard mode

ALT + NMLL On the Home screen Switches the signal strength from bars to a numeric value.

ALT + LGLG On the Home screen Displays the Java event log.

ALT + VIEW In an open message, or in an open-personal information management (PIM) items For messages, displays the refid and folderid for that particular message.For PIM items, displays only the refid.

ALT + CNFG On the Enterprise Activation screen Displays the advanced Enterprise Activation options.

ALT + CAP + H On the Home screen Displays the Help Me screen.

MEPD On the SIM Card SIM Screen displays all information Enterprise Activation (Options-> Advanced)

ALT + CNFG Settings for Enterprise Activation Address Book

ALT + VALD Validate the data structure and look for inconsistencies

ALT + RBLD Force a data structure rebuild from the Options menu, type the following (No ALT + required)RSET - Will prompt to erase & reload for a reload of the Address book from the BES(Nb this will wipe all entries, but you can goto SIM Phone Book & copy entries back afterwards)

ALT + RBVS View web page source code

ALT + VIEW Inside any Calendar item Show extra info for a Calendar event(Including message ID - handy for BES log troubleshooting) from the Options menu, type the following (No ALT + required)

SYNC Enable Calendar slow sync

RSET Will prompt for a reload of the calendar from the BES

RCFG Request BES configuration

SCFG Send device configuration

DCFG Get CICAL configuration

SUPD Enable detailed Cal. report for backup

SUPS Disable detailed Cal. report for backup

SUPN Disable Cal. database report

LUID Enable view by UID

SRSL Show Reminder status log

ALT + VIEW For messages, displays the refid and folderid for that particular message. For PIM items,

ALT + ADVM Search Application Enabled Advanced Global Search

ALT (left) + Shift (right) + Del Restart the Blackberry (only for full-keyboard Blackberries)

ALT + JKVV Display cause of PDP reject

ALT + CAP + H the Help  Me screen

ALT + EACE Displays the Help Me screen

ALT + ESCR \Displays the Help Me screen

ALT + NMLL Switches the signal strength from bars to a numeric value.

LGLG + ALT Displays the Java  event log.

ALT-SMON WLAN Enable simulated Wizard mode

ALT-SMOF WLAN Disable simulated Wizard mode
Theme (from theme menu)

ALT-THMN Change to no theme (B & W)

ALT-THMD Change to default theme
Date / Time (Date / Time menu - No ALT + required)

LOLO Date / Time Show Network time values


SIM Card (Options-> Advanced-> SIM card - No ALT + required)

MEPD Display MEP information

MEP1 Disable SIM personalization

MEP2 Disable Network personalization

MEP3 Disable Network subset personalization

MEP4 Disable Service provider personalization

MEP5 Disable Corporate personalization

LG cell phone Secret Codes

LG cell phone Secret Codes

LG all models test mode

Just type 2945#*# on the main screen.
2945*#01*# Secret menu for LG

*#06# IMEI {ALL}

*#07# IMEI and SW {LG 510}

*8375# Software version {LG B1200}

*6861# Recount chek sum {LG B1200}

#PWR 668 Factory test {B1200}

1945#*5101# Sim lock menu {LG 510W, 5200}

2945#*70001# Sim lock menu{LG 7020, 7010}

2947#* Sim lock menu {LG 500, 600}

Friday, June 13, 2014

BENQ SIEMENS SECRET CODES

Software version:
*#06#
to see more info, press softkey again

English menu:
*#0001#

Deutsch menu:
*#0049#

Secret Code:
*#0606# remove sim card before

Unlock Sim:
*#0003*(secret code)#

Bonus Screen:
*12022243121

Procedure on how to format your s60 v2..!!

Procedure on how to format your  s60 v2
If you have one or more of the following problem on your s60 v2

1. Blank screen phone unable to reboot.

2. Phone only able to boot-up to Nokia word screen.

3. Install some program but not able to uninstall it after that.

4. Error messages.

You Have to Do a Full cell phone formatting on your s60 v2

STEPS TO FOLLOW

1. Make sure that you have enough charge to perform a full formating.

2. Backup your contacts list and important personal files to MMC memory card.

3. Switch-off your s60 v2 phone.

4. Press and hold 3 keys;

Green dial key, * (star key) no. 3 key and then press the power on/off to swtich on the 6600 phone.

Remember!!! do not let go all of the keys and hold keys until you see a formatting word on a screen

5. After a few minutes when the Full phone formatting completed, your s60 v2 will back to original system and factory settting.
Those are steps that can help you in full formatting of your cell phone

Saturday, June 7, 2014

How to Upload and Download Files from SkyDrive in Windows 8..!!

How to Upload and Download Files from SkyDrive in Windows


SkyDrive this is a Cloud based storage service by Microsoft which lets you to share different Documents, Photos,Videos,music and other type of files.You Can Access your files from anywhere through any Windows 8 Devices, Windows Phones and Internet Explorer 10 by using your Microsoft Account.
In Windows 8 you can Download and upload files to SkyDrive by using SkyDrive App

UPLOADING A FILE TO SKYDRIVE USING SKYDRIVE APP


Uploading files to SkyDrive using SkyDrive App its very in Windows 8.
1 First you need to Open the SkyDrive by clicking on its icon.

2Then Login to SkyDrive using your Microsoft Account.

3 Now Right-click on empty space in the SkyDrive app to open contextual menu.

4 Click on Upload button.

5 Now Select the file which you want to upload and Click on Add to SkyDrive.

6 Now Upload process will begin and your file will be uploaded within a few minutes acording to your File Size.

ON SKYDRIVE YOU CAN UPLOAD FILES SAVED AS


1• Pdf files

2• Text files

3• Microsoft Office files

4• Music as WAV or MP3

5• Videos as AVI or WMV

6• Images as JPG,PNG GIF, BMP,JPEG,TIF, and TIFF file types.

DOWNLOADING FILES FROM SKYDRIVE USING SKYDRIVE APP

Downloading a File from SkyDrive in widows 8 also its as uploading file.

1 First of all Select and Right-Click on the file you want to Download and then Click on Download Button.

2 Now browse to where you want to save the file by clicking on Choose this Folder.

3 After Selecting the place for Downloading a File click on Ok Button.

4 Now File will be downloaded and saved on the selected place by you on your Computer.

READ MORE WINDOW 8 TIPS

how to Turn Windows SmartScreen ON and OFF in Windows 8..!!


how to Turn Windows SmartScreen ON and OFF in Windows 8..!!

how to Turn  Windows  SmartScreen  ON and OFF in Windows 8..!!

Windows SmartScreen in Windows 8 can help keep your PC safe by warning you before running any unrecognized apps downloaded from the Internet.

The following are steps on how to Turn Windows SmartScreen ON and OFF in Windows 8


1. First Open Control Panel and then go to the Action Center.

2. Click on change Windows Smartscreen settings, which is located in the left pane under Action Center.

3. If prompted by UAC, then click on Yes.

4. Select what do you want to do with unrecognized Apps. If you want to Turn OFF Windows SmartScreen then Select Don’t do anything, otherwise select from remaining two Options.

Important Its better to Get administrator approval before running an unrecognized app from the internet is Default Option and Highly Recommended.


NOTE THAT You Must be Signed In as Administrator for Turning Windows SmartScreen ON or OFF .

READ MORE WINDOW 8 TIPS

4 ways on how To Take a Screenshot In Windows 8..!!


Friday, June 6, 2014

4 ways on how To Take a Screenshot In Windows 8..!!

4 ways on how To  Take a  Screenshot
Windows 8 Operating System has Introduced easier method of Capturing a Screenshot. In Windows 8 after taking screenshot no need to copy and paste it in paint, automatically it will save in your Picture Folder as a PNG File.

THE FOLLOWING ARE THE STEPS OF TAKING A SCREEN SHOT WHEN USING WINDOW 8

1. First Open the screen which you want to take the Screenshot.

2. Hold down the Windows Key + Print Screen {Prt Scr} key and Release.

3. Now a screen dim will appear for seconds and then returns back to normal.

4. Now you can find your screenshot in Picture library Folder as a Png File.

You may edit it in a paint.!!that s t.

READ MORE WINDOW 8 TIPS

How to Update Applications in Windows 8..!!


How to Update Applications in Windows 8..!!

How to Update Applications in Windows 8..!!

App new updates in window 8 might fix old bug in app, add new features to the app or offer some additional data in App . So it is highly Recommended to install App Updates for keeping Windows Store Apps up-to-date . The following are simple steps for checking and installing windows store Apps updates in Windows 8 .

1. First click the Store App from Start Screen then The Microsoft Store will open .

2. Now Open the Settings and Click on App Updates which located in the upper-right corner of the Store screen. .

3. If you are not Signed In with your Microsoft account, then Sign in to Windows Store by using you Microsoft email id and Password.

4. Click on Check for updates .

5. If new update is Available for any App , check mark the App and Click on Install .

6. Now Process of updating Apps soon will be started .

When app updates have finished installing, you will see the message, Your apps were installed. . Now you can Close the Store by pressing Alt + F4 .

READ MORE WINDOW 8 TIPS

How to Shutdown/ Restart Windows 8..!!


Thursday, June 5, 2014

How To Find Your Lost or Stolen Windows Phone..!!

Losing your phone can be really annoying. Fortunately, Windows Phone has a free service called Find My Phone that can help you to recover your phone. It even goes a step further by giving you options to lock or erase your phone from any Internet-connected computer


TO SIGN IN AND TO FIND MY PHONE FOR THE FIRST TIME

The first time you use Find My Phone, you will need to sign in to it using your Microsoft account
1. On your computer, go to windowsphone.com.
2. Point to the phone in the upper-right corner, then click Find My Phone. If you are prompted, sign in with the same Microsoft account you used to sign in on your phone.

To find your phone On your computer, go to windowsphone.com
Find My Phone >>If you're prompted, sign in with the same Microsoft account you used to sign in on your phone.>>You'll see a map with your phone's location. You can zoom in or out to get a better view.

TIPS
1.If you would like to make a hard copy of your phone
2.If you have scrolled the map and lost track of your phone's location on it, click Center on map

TO RING OR LOCK YOUR PHONE

1. On your computer, go to windowsphone.com.
2. Point to the phone in the upper-right corner, then click Find My Phone. If you are prompted, sign in with the same Microsoft account you used to sign in on your phone
3.Do one of the following steps:
{A}To make your phone ring, click Ring and then follow the instructions. It will ring even if the volume is off or set to vibrate.
{B}To lock your phone and show a message on the lock screen, click Lock, and then follow the instructions. If you do not already have a password set up on your phone, you will need to enter one—you will use it to unlock the phone if you get it back.

TO ERASE YOUR PHONE

If you are certain you can not get your phone back, or if you have sensitive information on it that you want to protect until you recover it, you can erase your phone remotely.
1. On your computer, go to windowsphone.com.
2. Point to the phone in the upper right corner, then click Find My Phone. If you are prompted, sign in with the same Microsoft account you used to sign in on your phone.
3. Click Erase
4. If you're absolutely, positively sure, select the I'm sure! Please erase my phone now check box, and then click Erase.

NOTE THAT
It's a good idea to let your mobile operator know that you have lost your phone for safety.

TO CHANGE SETTING FOR FIND MY PHONE

You can set up Find My Phone to save your location every few hours, or to use push notifications instead of text messages to send commands to your phone faster and more cheaply. You will change these settings on your phone and not on your computer.
1. In the App list tap Settings and then tap Find my phone
2.Select either or both of the following check boxes:

{A}Always use push notifications to send commands and apps to my phone.
{B}Save my phone's location periodically and before the battery drop out to make it easier to find.

How to Shutdown/ Restart Windows 8..!!

Shutting down/Restarting windows 7 was never a problem for anyone. But if you have just now shifted/upgraded to windows 8 you might feel bit confused when you try to shutdown or restart windows 8. Unlike windows 7 there is no start button where you can go and simply choose the shutdown option. Since windows 8 has a totally new user interface many users may face a hard time finding the shutdown button. below is simple tip on how Shutdown/Restart Windows 8
OPTION 1
The best to shut down windows 8 is to use the Alt+F4 key combination. Simply press alt key and without releasing the alt key press F4 key and you would get a shutdown/restart prompt window like one shown below :

You can select various options like shutdown, restart, switch user, hibernate etc from the window.
OPTION 2

Other option is like shutting down the windows 7 using the start button but in slightly a different way. Press windows key to go to the home screen. Now simply click on the settings option.


After you click the settings option you would get a power button, simply click on it to get a small list menu containing the shutdown, restart and hibernate option


Those are simple steps on how you can Shutdown/Restart Windows 8

READ MORE WINDOW 8 TIPS

How to Start Windows 8 In Safe Mode..!!


Wednesday, June 4, 2014

How to Start Windows 8 In Safe Mode..!!

If you are looking for a Tutorial on how to run Windows 8 in Safe Mode, then below is the Step by Step guide on how to start windows 8 in Safe Mode.
Basically we start Computer in Safe Mode for Troubleshooting Errors and Starting System in Limited State.

There are 2 main ways to Start Windows 8 Operating System in Safe Mode :
1 Advanced Start up option
2 Msconfig Command Line Utility

THE FOLLOWING ARE ADVANCED START UP OPTION METHOD.
Steps to Follow :
Step 1 Open Search Box and on Search Box Type Advanced Start up, and then Click on the Advanced Start up Option.
Step 2 Now under Advanced Start up Click on the Restart Now.

Step 3 Click on the Troubleshoot Option.

Step 4 Choose Advanced Options.

Step 5 Now Select Windows Start up Settings.

Step 6 Click on Restart Button.

Step 7 After Waiting for few Seconds and Select the Safe Mode, your Computer will Start in Safe Mode.

READ MORE WINDOW 8 TIPS

>>New Look of Personalize in Windows 8..!!<<<

New Look of Personalize in Windows 8..!!

Windows 8 having a cool feature of Personalization. By using New Personalize option you can easily change the Start Screen and Account Picture.


HOW TO CHANGE LOCK SCREEN IN WINDOW 8
Lock Screen is nothing ,but it is the screen which you can see at windows start up and whenever your screen is locked you will get Notifications on the Lock Screen from the background running apps.
Go to PC Settings–>Personalize
You can select picture from available images or you can add your own custom image by browsing through the image location. Select custom image and then click on choose picture that’s it your lock screen wallpaper has been set.

HOW TO SET START SCREEN IN WINDOW 8
Start Screen is a screen which will be placed as background in window 8 apps
Click on Start Screen on the above Tab.
You can change the color of the screen as you wish by using the given color schemes.

HOW TO CHANGE ACCOUNT PICTURE IN WINDOW 8
Click on Account picture tab then you can set your account picture by browsing through or you can set account picture by using your own Camera.

READ MORE WINDOW 8 TIPS

>>>Create a Password For a User Account in Windows 8<<<<

Create a Password For a User Account in Windows 8

Creating a Password for User Account is a Good Way to Secure User Account in Windows 8 . So here are the simple on how to create a password for a User Account in Windows 8 .
Simple Steps to Follow :
Step 1. Go to PC Settings>> Users and Click on Create a password under the Sign-in Options.

Step 2. Now Enter your Password, Reenter Password,Enter Password Hint and Click on Next.

Step 3. Done..!! Password is created for User Account, Now Just Click on Finish.
If you want to Create Password for Another User Account, then Just Follow Below given simple Steps :
Step 1 Go to Control Panel >>-User Accounts >>- Manage another account.

Step 2. Click on the User Account for which you want to create Password and then Click on Create a password.

Step 3. Now Type your Password, Confirm Password, Type a Password Hint on Box and Click on Create Password.

Step 4. That’s It..!! Now You can see that your Another User Account is also password Protected.

Now you can Close Window.
NOTE THAT You Must be Signed In as an Administrator for Creating a Password for User Account.

READ MORE WINDOW 8 TIPS

>>>>How to Upgrade to Windows 8 From Windows 7 , XP and Vista<<<<

Tuesday, June 3, 2014

How to Upgrade to Windows 8 From Windows 7 , XP and Vista

How to Upgrade to Windows 8 From Windows 7 , XP and Vista
After the Public Testing in 190 Countries, Microsoft’s New Operating System Windows 8 is Officially Launched. So now it’s time to Upgrade to the Next Generation Operating System Windows 8. For Using Windows 8 you can do Clean Installation of Windows 8 or Upgrade from Windows XP, Windows Vista or Windows 7 to Windows 8 .
There are Two main ways of Upgrading to Windows 8 from Windows XP, Windows Vista or Windows 7

1 Software Download In this Method we can Upgrade to Windows 8 without using Installation DVD. We can Direct Download Windows 8 Setup from Microsoft’s Website.

2 Windows 8 Installation DVD :In this Method we upgrade to Windows 8 by using the Windows 8 Installation DVD.

Windows 8 System Requirements :
• 1 GHz or faster processor
• 1 GB RAM (32-bit) or 2 GB RAM (64-bit)
• 16 GB available hard disk space (32-bit) or 20 GB (64-bit)
• DirectX 9 graphics device with WDDM 10 or higher driver.

Supported OS and Retainable Items :
•Windows 7 : Maintains Windows settings, personal files, and apps.
•Windows Vista : Maintains the Windows settings and personal files.
•Windows XP SP3 : Maintains just personal files.
Note - Before Upgrading to Windows 8 Save your all Important Data to an External Storage Device.

Method 1 Software Download
1 Go to the Microsoft Website and Find the Details for Upgrading to Windows 8 at Special Price of just $39.99 .

2 After Clicking on Download Pro for $39.99 a Pop of Windows 8 Upgrade Assistant will Appear.Save and Run Windows8-UpgradeAssistant.exe.

3 – Now Windows 8 Upgrade Assistant will run a compatibility check to Inform you about compatible items and incompatible items on your Computer for Windows 8.You can check full detail by Clicking on See compatibility details.

4 After Checking System compatibility it will ask to choose what data you want to import .If you are using Windows 7, then you could choose Windows Settings, Personal Files and Apps.But You can also Choose Nothing to import.

5 Click on Next and Place Your Order for Windows 8 Pro at Just $39.99 .

6 You can also get Windows 8 Installation DVD by Paying extra $14.99 .Click on Checkout and Make the Payment through Credit Card or Paypal and fill Necessary Details.

7 After Successfully completing your order You will get the billing Receipt and Windows 8 product Key through email.

8 Now Windows 8 Upgrade Assistant will start downloading Windows 8 to your Computer. It will take some time to download the 2 GB file, depends on your Internet Speed.

9 Once the files have been downloaded, you can Install Windows 8 Immediately by selecting Install now, or you can create a Media version of it on DVD or USB by selecting Install by creating Media.

10 Now it will inform you about the things need attention before you can continue the Installation. First Uninstall incompatible items for Windows 8 and then click on Restart to continue the Installation.

11 Now you will get last change to make any changes in settings, If you are satisfied with your settings, then Just Click on Install and your Computer will Start Upgrading to Next Generation Operating System Windows 8.

12 Done !


Method 2 Windows 8 Installation DVD
1 First Insert the Windows 8 Installation Dvd into DVR Drive or Blu-ray reader and run the setup.exe file.

2 Windows 8 Setup will Start Preparing.

3 Select Go to Online to install updates now and Click on Next.

4 Enter the Product Key and Click on Next.

5 Read and Accept the License Terms and Click on Accept.
6 – Select Setting which you want to keep during the upgrade process and Click on Next.

7 Now Microsoft will check that your system is ready for upgrade or not and inform you if any item is incompatible with Windows 8 .

8 Uninstall the incompatible items and then Click on Install to Start Upgrade.

9 Now installation process will Start, Wait for the installation process to finish. During installation process system will reboot several times.

10 Now Personalization Process begins, you can Personalize your computer in Same way we did during Clean Installation of Windows 8
That’s It The upgrade has been performed, and your files, settings, and apps have been migrated according to your settings.

READ MORE WINDOW 8 TIPS

Windows 8 keyboard shortcuts


ENJOY!!
 

ONE TECHNO Copyright © 2012 Fast Loading -- Powered by Blogger