Warung Bebas

Sunday, May 31, 2015

How to Remove a computer Virus Manually

Computers have become an integral part of our life. Along with computers, Internet has also become an indispensable part. However, there is a negative side to the Internet technology, which is the rampant spread of computer viruses.      Therefore, computer security becomes a matter of major concern for every one. Although it is recommended that we should have an antivirus software installed on our machines, there are times that we may not have it installed and that is exactly when the computer may be infested by a software. This brings up the question, what are the steps to manually remove a virus so that the machine is not infested with the threatening virus.   Steps on how to Remove a Virus   You will need some computer programming skills to get rid of the computer virus. You will just need the knowledge of basic syntax. The first step you should take before you start with the computer viruses removal process is to take system back up. It is essential so that in case you delete a wrong file in the process, you will not lose important data.      In some cases, the file may be necessary to run the computer system. The data should ideally be backed up in an external device. Once the data has been backed up, you can format the system to get rid of the virus totally. However, it is not recommended that you use the system restore option to get rid of the virus, as this often leads to virus multiplication as opposed to removal.   The other process is a lengthy one which will need technical expertise. In this process, the first step is to identify the virus as there are many different types of computer viruses. To identify the virus you can seek help from various antivirus websites.      From these websites you will be able to see the way the particular virus makes files. Now you will have to look for the behavioral pattern of the virus. Once that has been identified, the next step is to go to task manager. From the task manager stop the virus processes so that there is no chance that the virus replicates itself. The next step is to go to the file registry and delete the virus files, taking help from the information you have found from the different websites pertaining to the virus.   Steps on how to Manually Remove a Trojan Virus   If you do not want to use the options available online for the removal of the Trojan, you will have to undertake the process of removing the virus manually. To remove Trojan virus, you will have to first identify the system files which are infected by the virus. The next step is to erase the files so that normal functioning of the system is possible. You can seek help from online forums or antivirus software websites.   I would recommend that although there are steps one can take to remove the virus manually, it is best to invest in a reputed antivirus to avoid attacks to your system where your data is at risk.

Computers have become an integral part of our life. Along with computers, Internet has also become an indispensable part. However, there is a negative side to the Internet technology, which is the rampant spread of computer viruses.

 Therefore, computer security becomes a matter of major concern for every one. Although it is recommended that we should have an antivirus software installed on our machines, there are times that we may not have it installed and that is exactly when the computer may be infested by a software. This brings up the question, what are the steps to manually remove a virus so that the machine is not infested with the threatening virus.

Steps on how to Remove a Virus

You will need some computer programming skills to get rid of the computer virus. You will just need the knowledge of basic syntax. The first step you should take before you start with the computer viruses removal process is to take system back up. It is essential so that in case you delete a wrong file in the process, you will not lose important data.

In some cases, the file may be necessary to run the computer system. The data should ideally be backed up in an external device. Once the data has been backed up, you can format the system to get rid of the virus totally. However, it is not recommended that you use the system restore option to get rid of the virus, as this often leads to virus multiplication as opposed to removal.

The other process is a lengthy one which will need technical expertise. In this process, the first step is to identify the virus as there are many different types of computer viruses. To identify the virus you can seek help from various antivirus websites.

 From these websites you will be able to see the way the particular virus makes files. Now you will have to look for the behavioral pattern of the virus. Once that has been identified, the next step is to go to task manager. From the task manager stop the virus processes so that there is no chance that the virus replicates itself. The next step is to go to the file registry and delete the virus files, taking help from the information you have found from the different websites pertaining to the virus.

Steps on how to Manually Remove a Trojan Virus

If you do not want to use the options available online for the removal of the Trojan, you will have to undertake the process of removing the virus manually. To remove Trojan virus, you will have to first identify the system files which are infected by the virus. The next step is to erase the files so that normal functioning of the system is possible. You can seek help from online forums or antivirus software websites.

I would recommend that although there are steps one can take to remove the virus manually, it is best to invest in a reputed antivirus to avoid attacks to your system where your data is at risk.

How to Bypass an Internet Filters Easily

The idea of Internet filtering refers to content control software or web filtering software designed for controlling the content that a user can access over the web. Often, Internet filter software are used in schools and offices to restrict user access to Internet resources.      An Internet filter is a software tool, with the help of which, web content accessible from a certain computer or network can be controlled. Internet filters serve as the means to monitor content that users of a particular computer or computer network are allowed to read. Internet filters can prove to be of help to parents who wish to monitor their kids' Internet use.   How Internet Filters Work  How does an Internet filter work? Internet filters can allow or block Internet access based on web content type or actual website URLs. The filtering can be done before the data reaches the client or before it is handled by the browser.      The allowing or blocking of web access is done by comparing browser requests with a predefined list of URLs to be banned. It can also be done by checking the incoming data on blocking parameters like content type and keywords. This allowing and blocking of web access is associated with terms like black list and white list.   The blacklisted site URLs are those which are disallowed access to, while those websites to which access is allowed are the white-listed ones. Internet filters can be used to ban access to websites that are marked under a certain category that is not intended for public use.      Net Nanny and Safe Eyes are some examples of Internet filters. Some Internet filtering methods restrict web users from searching for content. That is, web access is banned for a user who searches with controversial terms or 'blacklisted' words or phrases. Content labeling is another method used by Internet filters, wherein a small file describing the web page content is generated and used by the filter software to block or allow that page or website.      Most of the browsers today, come with Internet filtering capabilities. They allow users to place websites under security categories that the browsers can use for content filtering. Choosing an Internet service provider that restricts access to certain types of web content, is another way of implementing Internet filters.   Bypassing Internet Filters  It is a threat to Internet safety. It may not seem right to bypass Internet filters. But there's another side to it. There's criticism over whether restricting web access is right. Sometimes, Internet filters are blamed for banning useful information.      It's not always possible for a software to rightly filter every objectionable piece of content. At times, good content becomes a victim of web filtering, which is when bypassing Internet filters becomes a need.   Also, information that is offensive for one user may be useful for another. Controversial content which, some consider, should be banned, can be of use to individuals researching on the subject. The line of difference between what should be allowed and what should be blocked is not always defined.      Many times, the usefulness of web content depends on the users' interpretation of it. For these and other similar reasons, you might require to bypass Internet filters at work, home, or school.   How to Bypass Internet Filters?  Is it possible to easily bypass them? How exactly can that be done? Here are some easy ways.   Use Web Proxy  There are certain freely available web proxies that are downloadable from the Internet. They can help you bypass Internet filters employed in your school or at your workplace. You can search for free online proxies on the Internet. It will fetch you a list of free proxies that can be used. Or you could join a proxy mailing list to keep yourself updated with fresh proxies regularly.   A web proxy has an interface with a search box like element in which you can type the address of the website you intend to visit. On submitting the URL, you'll be directed to the website you didn't seem to have access to. Anonymous proxy servers are an effective means to bypass Internet filters.   The other option is to manually edit the proxy settings of your browser. You can actually set a proxy in the browser. For this, you'll need to go to Tools---}}}Options---}}}Connection Settings of your browser and change the proxy settings to a proxy.      If you are using Internet Explorer, go to the LAN settings in the connections tab, click to select 'proxy server', copy the address of the public proxy that you have selected in the 'Address' field, type in the port number of the proxy address and click OK.      If you are using Firefox, go to 'manual proxy configuration', write the proxy address and its port and check the 'use this proxy server for all protocols' option. This will enable you to use the same proxy for all the Internet protocols. Whenever you change the proxy, you will have to manually change the proxy settings for your browser.   Change the way you Browse  Browsing with text editors can help you. Open notepad, type the IP address of the website you intend to visit, save the file as filename.html and open it in a browser. Use the ping method to obtain the IP address of the website you wish to visit and remember to type the IP address with the 'http'. Opening the html file in a web browser should take you to the website you are looking for.   Remotely accessing the Internet is another method of easily bypassing Internet filters. Establish a remote connection with a computer that does not employ any kind of web filtering. With remote Internet access, bypassing Internet filters won't be a problem.      If it's the browser which is restricting your web access, changing the browser or downloading a portable browser for use, should solve the problem. Another way to bypass web filters is to use web page translation sites. Use a translation site like bablefish or google translate, enter the address of the blocked website and select the 'translate to English' option. This method can be used to bypass web filters only if translation sites are not blocked.     Use the IP Address  This is one the best methods and it's also quite simple. All you need to do is go to the Command Prompt, type 'ping '. Here, enter the address of the website (without the http://) you wish to access by bypassing the web filter. You will see 'pinging [] in the window. The number, precisely, the set of four numbers, that follows the website name, is its IP address. You could also use the 'nslookup' by typing nslookup . Refer to the 'address' in the 'non-authoritative answer' field that appears after the command is executed. It is the IP address of the website you intend to access.   Note: If you don't have access to the command prompt, open notepad, type cd.. or cd\, then type cmd and save the file as 'cmd.bat'. Doubleclicking on the file should take you to the command prompt. This method serves as an easy Internet filter bypass.      Disabling Internet Filters  The first step in disabling web filters is to go to the control panel. Switch to Classic view, click on Internet Options, click on the Security tab, choose 'custom level' settings. It will take you to Security Settings - Internet Zone. Here, you'll be able to edit the Internet filter settings.      On the security tab, you'll find an option to change the security levels. Changing them might be of help. However, lowering the security levels can pose a major threat to your computer security. Changing your browser settings to disable the blocker is another way to go.   While adopting any of these methods for bypassing Internet filters, be careful. You might have to face legal consequences if you are breaching Internet security for the wrong reasons. After all, bypassing something that you are supposed to pass through, cannot be risk-free. So, be careful.

The idea of Internet filtering refers to content control software or web filtering software designed for controlling the content that a user can access over the web. Often, Internet filter software are used in schools and offices to restrict user access to Internet resources.

An Internet filter is a software tool, with the help of which, web content accessible from a certain computer or network can be controlled. Internet filters serve as the means to monitor content that users of a particular computer or computer network are allowed to read. Internet filters can prove to be of help to parents who wish to monitor their kids' Internet use.

How Internet Filters Work
How does an Internet filter work? Internet filters can allow or block Internet access based on web content type or actual website URLs. The filtering can be done before the data reaches the client or before it is handled by the browser.

The allowing or blocking of web access is done by comparing browser requests with a predefined list of URLs to be banned. It can also be done by checking the incoming data on blocking parameters like content type and keywords. This allowing and blocking of web access is associated with terms like black list and white list.

The blacklisted site URLs are those which are disallowed access to, while those websites to which access is allowed are the white-listed ones. Internet filters can be used to ban access to websites that are marked under a certain category that is not intended for public use.

Net Nanny and Safe Eyes are some examples of Internet filters. Some Internet filtering methods restrict web users from searching for content. That is, web access is banned for a user who searches with controversial terms or 'blacklisted' words or phrases. Content labeling is another method used by Internet filters, wherein a small file describing the web page content is generated and used by the filter software to block or allow that page or website.

 Most of the browsers today, come with Internet filtering capabilities. They allow users to place websites under security categories that the browsers can use for content filtering. Choosing an Internet service provider that restricts access to certain types of web content, is another way of implementing Internet filters.

Bypassing Internet Filters
It is a threat to Internet safety. It may not seem right to bypass Internet filters. But there's another side to it. There's criticism over whether restricting web access is right. Sometimes, Internet filters are blamed for banning useful information.

 It's not always possible for a software to rightly filter every objectionable piece of content. At times, good content becomes a victim of web filtering, which is when bypassing Internet filters becomes a need.

Also, information that is offensive for one user may be useful for another. Controversial content which, some consider, should be banned, can be of use to individuals researching on the subject. The line of difference between what should be allowed and what should be blocked is not always defined.

Many times, the usefulness of web content depends on the users' interpretation of it. For these and other similar reasons, you might require to bypass Internet filters at work, home, or school.

How to Bypass Internet Filters?
Is it possible to easily bypass them? How exactly can that be done? Here are some easy ways.

Use Web Proxy
There are certain freely available web proxies that are downloadable from the Internet. They can help you bypass Internet filters employed in your school or at your workplace. You can search for free online proxies on the Internet. It will fetch you a list of free proxies that can be used. Or you could join a proxy mailing list to keep yourself updated with fresh proxies regularly.

A web proxy has an interface with a search box like element in which you can type the address of the website you intend to visit. On submitting the URL, you'll be directed to the website you didn't seem to have access to. Anonymous proxy servers are an effective means to bypass Internet filters.

The other option is to manually edit the proxy settings of your browser. You can actually set a proxy in the browser. For this, you'll need to go to Tools---}}}Options---}}}Connection Settings of your browser and change the proxy settings to a proxy.

 If you are using Internet Explorer, go to the LAN settings in the connections tab, click to select 'proxy server', copy the address of the public proxy that you have selected in the 'Address' field, type in the port number of the proxy address and click OK.

 If you are using Firefox, go to 'manual proxy configuration', write the proxy address and its port and check the 'use this proxy server for all protocols' option. This will enable you to use the same proxy for all the Internet protocols. Whenever you change the proxy, you will have to manually change the proxy settings for your browser.

Change the way you Browse
Browsing with text editors can help you. Open notepad, type the IP address of the website you intend to visit, save the file as filename.html and open it in a browser. Use the ping method to obtain the IP address of the website you wish to visit and remember to type the IP address with the 'http'. Opening the html file in a web browser should take you to the website you are looking for.

Remotely accessing the Internet is another method of easily bypassing Internet filters. Establish a remote connection with a computer that does not employ any kind of web filtering. With remote Internet access, bypassing Internet filters won't be a problem.

 If it's the browser which is restricting your web access, changing the browser or downloading a portable browser for use, should solve the problem. Another way to bypass web filters is to use web page translation sites. Use a translation site like bablefish or google translate, enter the address of the blocked website and select the 'translate to English' option. This method can be used to bypass web filters only if translation sites are not blocked.

Use the IP Address
This is one the best methods and it's also quite simple. All you need to do is go to the Command Prompt, type 'ping '. Here, enter the address of the website (without the http://) you wish to access by bypassing the web filter. You will see 'pinging [] in the window. The number, precisely, the set of four numbers, that follows the website name, is its IP address. You could also use the 'nslookup' by typing nslookup . Refer to the 'address' in the 'non-authoritative answer' field that appears after the command is executed. It is the IP address of the website you intend to access.

Note: If you don't have access to the command prompt, open notepad, type cd.. or cd\, then type cmd and save the file as 'cmd.bat'. Doubleclicking on the file should take you to the command prompt. This method serves as an easy Internet filter bypass.


Disabling Internet Filters
The first step in disabling web filters is to go to the control panel. Switch to Classic view, click on Internet Options, click on the Security tab, choose 'custom level' settings. It will take you to Security Settings - Internet Zone. Here, you'll be able to edit the Internet filter settings.

On the security tab, you'll find an option to change the security levels. Changing them might be of help. However, lowering the security levels can pose a major threat to your computer security. Changing your browser settings to disable the blocker is another way to go.

While adopting any of these methods for bypassing Internet filters, be careful. You might have to face legal consequences if you are breaching Internet security for the wrong reasons. After all, bypassing something that you are supposed to pass through, cannot be risk-free. So, be careful.

Trick on How to Remove Trojan Horse Virus

A Trojan horse is a type of computer virus which cannot duplicate by itself, but allows unauthorized access to the user's system. This computer virus is designed to allow hackers to gain access to a distant computer system. The hacker could steal data, install software, download or upload files, or even crash the computer system infected by the Trojan.   Trojans enter a computer mostly through the Internet. It could be through movie or music downloads, e-mail attachments, application exploits, or software downloads. Since hackers want to attack your system through the net, they disguise Trojan viruses in files which are popularly downloaded.   There are specific antivirus software designed for removing Trojans. They help in detecting as well as removing the virus from your system; certain malware protection applications also help in preventing them from entering your system. It is also possible to manually detect and uninstall files infected by the Trojan.   Options to Remove Trojans   TRICK. 1  Go to 'C' drive and click on 'Program Files' → 'Common' → 'Microsoft Shared' → 'Msinfo'. This particular program will show you all the processes, including the hidden processes, which are running on your windows system. Check all task listings and detect the ones you do not recognize. Open these tasks and also figure out their file names and paths. Let your virus scanner scan through all these files.   TRICK. 2  Open the anti-virus software you have installed in your computer, and allow it to run a virus scan through your computer. Once the scan is over, if there was any value detected in the registry, delete it. You can do this by clicking on the 'Run' option present in the 'Start' menu. In the space provided for typing, type 'regedit' and click on 'OK'. Find the value detected in the virus scan you ran before and delete it from your system.   TRICK. 3  The best way of Trojan removal from your system is to run a scan. Ensure that you have the latest and updated version of antivirus software available in the market which can efficiently spot and delete any spyware, virus or adware from your system. In case you do not have one, there are certain free spyware removal programs available as well. Allow the virus scanner to do its job and once all viruses are detected and deleted from your computer, restart the system and it should work fine.   Removing Trojans in Windows XP    Log on to your system as an administrator.     Drag your mouse cursor on the 'My Computer' icon, right click on it and select the 'Properties' option.     Click on the 'System Restore' option and select the 'Turn off System Restore' option.     You will now have to start your computer in 'Safe Mode'. For this, shut down your system and also switch off the power.     Wait for a minute and start your computer once again.     As soon as the computer starts booting, tap the 'F8' key for the 'Windows Advanced Options' menus to appear.     From this menu, select the safe mode option. Hit 'Enter' to allow the computer to start in safe mode.     Run your anti adware and anti spyware programs in safe mode.     Restart your computer in the normal mode and rerun adware and spyware programs.     On getting a clean report, follow the instructions given earlier to turn on the system restore.   If on completing your cleanup task, you notice the damage to your system was substantial, it is better you erase all data from your hard disk and re-install the operating system and other important software once again.      Cases of computers being hacked through introduction of Trojans are increasing and hence, it is important to have necessary knowledge about deleting them. To prevent any such situations, avoid downloading unprotected and unsecured files from the internet and try to keep your anti-virus software up-to-date.

A Trojan horse is a type of computer virus which cannot duplicate by itself, but allows unauthorized access to the user's system. This computer virus is designed to allow hackers to gain access to a distant computer system. The hacker could steal data, install software, download or upload files, or even crash the computer system infected by the Trojan.

Trojans enter a computer mostly through the Internet. It could be through movie or music downloads, e-mail attachments, application exploits, or software downloads. Since hackers want to attack your system through the net, they disguise Trojan viruses in files which are popularly downloaded.

There are specific antivirus software designed for removing Trojans. They help in detecting as well as removing the virus from your system; certain malware protection applications also help in preventing them from entering your system. It is also possible to manually detect and uninstall files infected by the Trojan.

Options to Remove Trojans

TRICK. 1
Go to 'C' drive and click on 'Program Files' → 'Common' → 'Microsoft Shared' → 'Msinfo'. This particular program will show you all the processes, including the hidden processes, which are running on your windows system. Check all task listings and detect the ones you do not recognize. Open these tasks and also figure out their file names and paths. Let your virus scanner scan through all these files.

TRICK. 2
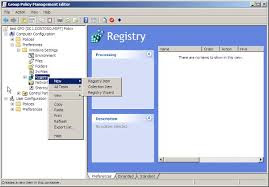
Open the anti-virus software you have installed in your computer, and allow it to run a virus scan through your computer. Once the scan is over, if there was any value detected in the registry, delete it. You can do this by clicking on the 'Run' option present in the 'Start' menu. In the space provided for typing, type 'regedit' and click on 'OK'. Find the value detected in the virus scan you ran before and delete it from your system.

TRICK. 3
The best way of Trojan removal from your system is to run a scan. Ensure that you have the latest and updated version of antivirus software available in the market which can efficiently spot and delete any spyware, virus or adware from your system. In case you do not have one, there are certain free spyware removal programs available as well. Allow the virus scanner to do its job and once all viruses are detected and deleted from your computer, restart the system and it should work fine.

Removing Trojans in Windows XP

 Log on to your system as an administrator.

Drag your mouse cursor on the 'My Computer' icon, right click on it and select the 'Properties' option.

Click on the 'System Restore' option and select the 'Turn off System Restore' option.

You will now have to start your computer in 'Safe Mode'. For this, shut down your system and also switch off the power.

Wait for a minute and start your computer once again.

As soon as the computer starts booting, tap the 'F8' key for the 'Windows Advanced Options' menus to appear.

From this menu, select the safe mode option. Hit 'Enter' to allow the computer to start in safe mode.

Run your anti adware and anti spyware programs in safe mode.

Restart your computer in the normal mode and rerun adware and spyware programs.

On getting a clean report, follow the instructions given earlier to turn on the system restore.

If on completing your cleanup task, you notice the damage to your system was substantial, it is better you erase all data from your hard disk and re-install the operating system and other important software once again.

Cases of computers being hacked through introduction of Trojans are increasing and hence, it is important to have necessary knowledge about deleting them. To prevent any such situations, avoid downloading unprotected and unsecured files from the internet and try to keep your anti-virus software up-to-date.

How to Recover Deleted Files and Restore Lost Data in your computer.!!!

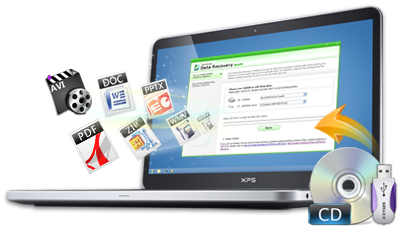
Computers are an integral part of our life today. A few years ago, computers were rarely treated as a dependable tool for business purposes. However, with the advent of paperless offices today, most documents are available only in e-formats. Therefore, data backup has become a necessity and is a must for computers used for professional as well as personal needs.   Data and files can be deleted from the computer for a varied number of reasons. Sometimes, important data may be deleted accidentally. This is when one tries to frantically recover deleted files or restore lost data.   Even if you have just deleted some files in the middle of the night accidentally, there is some hope. First off, if you have just deleted the file, you can always go to the Recycle Bin, select the file you need and then click 'Restore The File' from the toolbar.   This process is also known as 'undelete' in computer lingo. However, if you have deleted the file from the computer as well as emptied the recycle bin, you will have to depend on professional help to salvage your data.   One of the best options to secure and, therefore, restore your data is to keep a backup of your data on another computer or drive. You can also have your entire data written or burned on a CD or DVD. Today, there are portable data devices like portable hard disks, pen drives, and some MP3 players which double up as a portable hard disk. Therefore, it isn't necessary to have a whole computer system to have a backup of your system.   If you have not made a backup of your system in a long time, nor have prepared a CD of your important data, you still have options to restore lost data from your PC. There are various software available in the market which can restore your data. Though expensive, the day these software recover your data, they will be worth their cost in gold doubloons.   Such software is known as undelete software for windows, and these can recover data from almost any data drive like hard disks, pen drives, USB drives, and zip drives. They can even recover data from data cards in digital cameras and cell phones.   The software can recover files deleted and emptied from the Recycle Bin, files deleted using MSDOS commands, as well as data you have accidentally deleted using the Shift+Delete command. It also restores data lost during the 'Cut' 'Copy' or 'Move' command. More importantly, the software even restores data lost due to viruses.   Like all software, one can find various trial versions of such undelete software on the internet. You can use it for a while and judge whether it is perfect for your needs. Other than that, you can browse the Internet and find more about the features and details of the software, and decide which one suits your needs the best.   Undelete software isn't just necessary or important for professional users of the computers. It is the need of the day for everyone using a computer. Data loss can mean loss of all saved games for the gamer, the loss of the month's budget workout for the homemaker, or even the loss of a month's work for a work-at-home person.   Such software is economical and logical as compared to running to the computer guys once you have accidentally deleted data from your computer.
Computers are an integral part of our life today. A few years ago, computers were rarely treated as a dependable tool for business purposes. However, with the advent of paperless offices today, most documents are available only in e-formats. Therefore, data backup has become a necessity and is a must for computers used for professional as well as personal needs.

Data and files can be deleted from the computer for a varied number of reasons. Sometimes, important data may be deleted accidentally. This is when one tries to frantically recover deleted files or restore lost data.

Even if you have just deleted some files in the middle of the night accidentally, there is some hope. First off, if you have just deleted the file, you can always go to the Recycle Bin, select the file you need and then click 'Restore The File' from the toolbar.

This process is also known as 'undelete' in computer lingo. However, if you have deleted the file from the computer as well as emptied the recycle bin, you will have to depend on professional help to salvage your data.

One of the best options to secure and, therefore, restore your data is to keep a backup of your data on another computer or drive. You can also have your entire data written or burned on a CD or DVD. Today, there are portable data devices like portable hard disks, pen drives, and some MP3 players which double up as a portable hard disk. Therefore, it isn't necessary to have a whole computer system to have a backup of your system.

If you have not made a backup of your system in a long time, nor have prepared a CD of your important data, you still have options to restore lost data from your PC. There are various software available in the market which can restore your data. Though expensive, the day these software recover your data, they will be worth their cost in gold doubloons.

Such software is known as undelete software for windows, and these can recover data from almost any data drive like hard disks, pen drives, USB drives, and zip drives. They can even recover data from data cards in digital cameras and cell phones.

The software can recover files deleted and emptied from the Recycle Bin, files deleted using MSDOS commands, as well as data you have accidentally deleted using the Shift+Delete command. It also restores data lost during the 'Cut' 'Copy' or 'Move' command. More importantly, the software even restores data lost due to viruses.

Like all software, one can find various trial versions of such undelete software on the internet. You can use it for a while and judge whether it is perfect for your needs. Other than that, you can browse the Internet and find more about the features and details of the software, and decide which one suits your needs the best.

Undelete software isn't just necessary or important for professional users of the computers. It is the need of the day for everyone using a computer. Data loss can mean loss of all saved games for the gamer, the loss of the month's budget workout for the homemaker, or even the loss of a month's work for a work-at-home person.

Such software is economical and logical as compared to running to the computer guys once you have accidentally deleted data from your computer.

Hard Disk Failure and Data Recovery Tips and tricks

Computer hard disks from either laptops or desktops are susceptible to failure, where the data that you have stored on it either disappears, or cannot be found.      The good news is that this data can often be recovered. There are various ways of doing so. Before you venture into data recovery territory, it is essential to know the cause of the hard disk failure.   Hard Disk Failure Causes     There are many reasons that can cause the hard disk of a computer to fail. Mostly, these can be classified as under three main types: logical, electrical, or mechanical.   Logical     Logical causes include problems with the boot sector of the hard drive, which leads to non-booting of Windows. In this case, you would be able to access your hard drive from another computer. You can then investigate if you have problems with the boot sector, or if you have bad sectors on the disk itself. Hard disk data recovery, in this case, can be possible with data recovery software.    Mechanical     Mechanical problems are caused when the hard drive and/or its parts have been physically damaged; this can occur due to a number of causes. You may hear clicking sounds from the hard disk itself. This kind of failure can also be caused by dropping the hard disk, or exposing it to water or a humid atmosphere. Under no circumstances must you try to shake the hard disk or remove the hard disk cover. Most times, physical repair is not possible. You can find a data recovery service provider who may be able to help you with this problem.     Electrical     Electrical causes include problems caused due to voltage fluctuations, which may have led to the burning of the circuit board. For this, you may have to open your desktop's ATX box or your laptop's bottom cover. Ensure that you have shut off the electrical supply to your machine and are working in a static-free environment. You also need to wear an ESD wrist strap. Under no circumstances must you touch the circuit board, as this might damage the disk head. Just try to see if you can spot any signs of burnt components or burns on the circuit board. If you can, contact your hardware supplier or a service agent to figure out the next step.      Tips for Hard Disk Data Recovery  Here are some tips for general hard disk data recovery suggested by professionals in this field.   Always use firewalls and good virus protection programs for your computer.  Don't run the disk defragmenter if you want to recover a file that you have ended up deleting. Use a data recovery software first. Doing so will increase your chances of recovering the lost data.        Programs such as scandisk, chkdsk, or Norton Disk Doctor will not help you with data recovery. In fact, they may often end up hinder the process of hard disk data recovery.     If your computer is not booting, you can try booting it in safe mode and try to disable or uninstall any recently installed programs which may have caused the problem. You can also try to see if running System Restore solves the problem.     Before you buy data recovery software, ensure that you know exactly what kind of data it recovers. Instead of trying out a variety of software, first know what kind of data you want to recover, and then look for software which will meet your needs.     Know what kind of file system your computer hard drive uses. This will help in locating the right software for the recovery process.     The best tip ever is to always keep a backup of your important data.  Sometimes it may not be possible to constantly keep backing up data, especially with recent files. If your hard disk crashes while you are working, don't try to save the file as you may also end up losing data saved earlier.     Before you go to experts, make sure that you know relevant details, such as the operating system, the details of what happened before your hard disk failed, and if your computer still recognizes the drive or not.   These tips will help you identify the problem, and can even help you with data recovery on your own

Computer hard disks from either laptops or desktops are susceptible to failure, where the data that you have stored on it either disappears, or cannot be found.

The good news is that this data can often be recovered. There are various ways of doing so. Before you venture into data recovery territory, it is essential to know the cause of the hard disk failure.

Hard Disk Failure Causes

There are many reasons that can cause the hard disk of a computer to fail. Mostly, these can be classified as under three main types: logical, electrical, or mechanical.

Logical

Logical causes include problems with the boot sector of the hard drive, which leads to non-booting of Windows. In this case, you would be able to access your hard drive from another computer. You can then investigate if you have problems with the boot sector, or if you have bad sectors on the disk itself. Hard disk data recovery, in this case, can be possible with data recovery software.


Mechanical

Mechanical problems are caused when the hard drive and/or its parts have been physically damaged; this can occur due to a number of causes. You may hear clicking sounds from the hard disk itself. This kind of failure can also be caused by dropping the hard disk, or exposing it to water or a humid atmosphere. Under no circumstances must you try to shake the hard disk or remove the hard disk cover. Most times, physical repair is not possible. You can find a data recovery service provider who may be able to help you with this problem.

Electrical

Electrical causes include problems caused due to voltage fluctuations, which may have led to the burning of the circuit board. For this, you may have to open your desktop's ATX box or your laptop's bottom cover. Ensure that you have shut off the electrical supply to your machine and are working in a static-free environment. You also need to wear an ESD wrist strap. Under no circumstances must you touch the circuit board, as this might damage the disk head. Just try to see if you can spot any signs of burnt components or burns on the circuit board. If you can, contact your hardware supplier or a service agent to figure out the next step.


Tips for Hard Disk Data Recovery
Here are some tips for general hard disk data recovery suggested by professionals in this field.

Always use firewalls and good virus protection programs for your computer.
Don't run the disk defragmenter if you want to recover a file that you have ended up deleting. Use a data recovery software first. Doing so will increase your chances of recovering the lost data.


Programs such as scandisk, chkdsk, or Norton Disk Doctor will not help you with data recovery. In fact, they may often end up hinder the process of hard disk data recovery.

If your computer is not booting, you can try booting it in safe mode and try to disable or uninstall any recently installed programs which may have caused the problem. You can also try to see if running System Restore solves the problem.

Before you buy data recovery software, ensure that you know exactly what kind of data it recovers. Instead of trying out a variety of software, first know what kind of data you want to recover, and then look for software which will meet your needs.

Know what kind of file system your computer hard drive uses. This will help in locating the right software for the recovery process.

The best tip ever is to always keep a backup of your important data.
Sometimes it may not be possible to constantly keep backing up data, especially with recent files. If your hard disk crashes while you are working, don't try to save the file as you may also end up losing data saved earlier.

Before you go to experts, make sure that you know relevant details, such as the operating system, the details of what happened before your hard disk failed, and if your computer still recognizes the drive or not.

These tips will help you identify the problem, and can even help you with data recovery on your own

Trick on how to Data Recovery

Backup is better than recovery; just as 'prevention is better than cure'. Always keep a backup of your crucial data. In fact, you should not try the different recovery techniques on crucial data. It is always advisable, that in such cases, you contact a recovery agency which can provide you with accurate details as to what percentage of the data is in its recoverable form. This may cost you some bucks, but then, it is worth it if the lost information is important enough.   Various software and tools are used by data recovery agencies, which have been designed by their engineers, or may have been purchased by them. For recovery that you can undertake on your own, you can use the open source software that are available for download.      The first and the most important thing that you need to keep in mind, once you have realized that you have by accident deleted some data, is not to use the drive where you had stored it. Do the preliminary checking first, before you start with the recovery process. Check the recycle bin, if you have by accident deleted the data. Perform a search operation, using the search feature of your operating system, to check out if you have placed the it into some other location.      If you are using the Windows operating system, open the folder where you had stored your data and click on tools in the menu bar. Select 'folder options' from the tools menu and click on the view tab. Select 'Show hidden files and folder'. In case the files are hidden because of some virus problems, you may be able to view them again with this process.   Recovery Techniques   If all these processes do not help you out, you can start off with the recovery techniques. By the way, you must be wondering, how can deleted data be recovered? Let me try to explain. Computers store your data in the binary format, i.e., using only the digits 0 and 1.      Once you delete some it or format the hard drive, that portion of the hard drive loses its name and identification (the word is address) and becomes free to allocate new data, but the binary digit format continues to exist in it.      The only way this binary digit format can be lost is, if some other data is saved by the computer at the same location. The other way is of course, when you want to intentionally eliminate it from your system, and you have used a file shredding software to do the same.   Depending on the file system that you have chosen, while installing your operating system, download a compatible recovery software. Some software like N-Data recovery will work well for both FAT and NTFS, while NTFS file recovery will work only for NTFS file systems.      Please make it a point to download the software into some other drive and not into the one from which you have lost your data. In fact, it is better if you download the software into another computer. Install the software in a drive that is not among the suspected list of drives, from where you think you have lost your data. Better install the software in a USB drive (pen drive or portable hard disk). Scan the suspected drives. The process will take some time and consume a lot of RAM, so avoid using the computer for any other work when the scan is in progress.   Save the recovered files (if they have been recovered at all) into a drive. If you do not get proper results, try some other software which has advanced features. There are software available which allow you to enter details like the type of file or the file extension of the file you are trying to recover.      This makes the recovery process for the software a lot simpler. The software available can be used on almost all types of memory, the hard disk, pen drive, or a portable music player.   These processes can help you recover the data, but there is no guarantee. Software are also available which will recover it in a different format and you will have to purchase a license key of the software, to reconvert your data into its original form.      Some software will recover the data for you, but won't provide you with a facility to save it, unless you buy a license key. So, choose an open source software for the recovery process, if you do not want to spend any money.
Backup is better than recovery; just as 'prevention is better than cure'. Always keep a backup of your crucial data. In fact, you should not try the different recovery techniques on crucial data. It is always advisable, that in such cases, you contact a recovery agency which can provide you with accurate details as to what percentage of the data is in its recoverable form. This may cost you some bucks, but then, it is worth it if the lost information is important enough.

Various software and tools are used by data recovery agencies, which have been designed by their engineers, or may have been purchased by them. For recovery that you can undertake on your own, you can use the open source software that are available for download.

The first and the most important thing that you need to keep in mind, once you have realized that you have by accident deleted some data, is not to use the drive where you had stored it. Do the preliminary checking first, before you start with the recovery process. Check the recycle bin, if you have by accident deleted the data. Perform a search operation, using the search feature of your operating system, to check out if you have placed the it into some other location.

If you are using the Windows operating system, open the folder where you had stored your data and click on tools in the menu bar. Select 'folder options' from the tools menu and click on the view tab. Select 'Show hidden files and folder'. In case the files are hidden because of some virus problems, you may be able to view them again with this process.

Recovery Techniques

If all these processes do not help you out, you can start off with the recovery techniques. By the way, you must be wondering, how can deleted data be recovered? Let me try to explain. Computers store your data in the binary format, i.e., using only the digits 0 and 1.

 Once you delete some it or format the hard drive, that portion of the hard drive loses its name and identification (the word is address) and becomes free to allocate new data, but the binary digit format continues to exist in it.

 The only way this binary digit format can be lost is, if some other data is saved by the computer at the same location. The other way is of course, when you want to intentionally eliminate it from your system, and you have used a file shredding software to do the same.

Depending on the file system that you have chosen, while installing your operating system, download a compatible recovery software. Some software like N-Data recovery will work well for both FAT and NTFS, while NTFS file recovery will work only for NTFS file systems.

 Please make it a point to download the software into some other drive and not into the one from which you have lost your data. In fact, it is better if you download the software into another computer. Install the software in a drive that is not among the suspected list of drives, from where you think you have lost your data. Better install the software in a USB drive (pen drive or portable hard disk). Scan the suspected drives. The process will take some time and consume a lot of RAM, so avoid using the computer for any other work when the scan is in progress.

Save the recovered files (if they have been recovered at all) into a drive. If you do not get proper results, try some other software which has advanced features. There are software available which allow you to enter details like the type of file or the file extension of the file you are trying to recover.

This makes the recovery process for the software a lot simpler. The software available can be used on almost all types of memory, the hard disk, pen drive, or a portable music player.

These processes can help you recover the data, but there is no guarantee. Software are also available which will recover it in a different format and you will have to purchase a license key of the software, to reconvert your data into its original form.

 Some software will recover the data for you, but won't provide you with a facility to save it, unless you buy a license key. So, choose an open source software for the recovery process, if you do not want to spend any money.

How to Fix Corrupted Files in your computer

Corrupted files are files that become non-functional altogether. There are several reasons for the file getting corrupted. It can be a glitch in the operating system or in the program utilizing the file, improper file saving procedure, a system crash, or a result of some dangerous computer virus.      The damage could also be on the hardware level, if the file system sector or the hard drive itself is damaged. Let's learn how to understand when a file gets corrupted and the ways to fix it.   When the file you are trying to access does not open and displays a message like 'Cannot open file' or 'File data inaccessible' then it's a clear indication that the file is corrupted.      In case the file opens but the data within is unreadable, i.e., showing signs and symbols other than normal alphabets and numbers, then the file is corrupted.   Fixing Corrupt Files   AVI Files  AVI (Audio Video Interleave) files are video files that run on a program application that is designed to play an .avi file. To fix such files, all you have to do is download a software that renders an AVI file correct. If the software is zipped or compressed, unzip it using a software like Winzip.      After all the files are displayed, click on the setup file and follow the instructions to set up the software on your computer. Now, run the software, the interface window will display the functionalities that the software renders. Browse and add the corrupted AVI files and click on the button for repair. The repaired files may be stored in the same location as the previous files, or it may prompt you to select a new location.      Different software will provide different facilities, so select one that suits your needs. Few examples of AVI file repair software are DivXRepair 1.0.1, Avi Previewer 2.27, RegCure, ASF-AVI-RM-WMV Repair, etc.      Word Files     Word files are document files that contain text data. When a word file gets corrupted, download a word file repair software to resurrect the files. Click on the software's icon and follow the instructions. Some software may need installation while others may not.   Examples of word document repair software are Repair MyWord, Nucleus Kernel Word Document Repair Software, etc. Repair MyWord can be downloaded free of cost and it provides an easy interface for the retrieval of files.        JPEG Files     JPEG is the short form of Joint Photographic Experts Group. When a .jpeg/.jpg image does not open with any default application programs like Paint, Windows Photo Gallery, Fax Viewer, etc., it is corrupt. To retrieve the image, try renaming and saving the picture file with a .jpg extension.      Another option is to use JPEG image recovery tools. Using these tools is a trial and error process, as it is difficult to figure out which one of the tools will recover the images successfully. The procedure for downloading and executing the tools is same as that mentioned above. Examples of JPEG recovery software tools are JPEG Recovery, and Picture Doctor. You can also try opening the pictures with ACDSee, or Irfanview.      Zip Files     Zip files are the compressed form of large files. Files that are very large in size are generally zipped/compacted using a compressing software, specially if they are to be sent through a mail or have to be saved on an external memory drive of low capacity.      The procedure for recovering zip files is the same, and requires a recovery software tool. Download it, follow the steps and run the application. Add the zip file to be retrieved. The software will scan the zip file and show you the result. Select from the files the ones you want to repair and go to the next step. Software examples for fixing zip files are Zip Repair Software 1.0, Zip Repair Tool 3.3, and Actual Zip Repair 2.1.      Files on PSP     First and foremost, check if the file you are trying to open in your PSP (PlayStation Portable) is compatible with the PSP file format or not. If your PSP does not support the file format, you may have to convert the file to the file format supported by your PSP.      A direct method to repair the corrupted file is to connect the PSP to the computer and run the data recovery software on your PC. Include the files on the PSP in the recovery software and retrieve them. If that is not possible, put the corrupted files back on your computer, recover the files using a recovery tool for that file format and put it back on the PSP.   Some of the data recovery software may not be available free of cost. If they are not freeware then you can download a trial or demo version to repair your files. Also, remember that a software that works for someone else may not necessarily work for you.      Hence, you may have to employ the trial and error method to check the validity of the software. In case of a virus, you may need to run an antivirus software, after which the corrupted files may open. In case of hardware failure, hard drive data recovery is also possible.

Corrupted files are files that become non-functional altogether. There are several reasons for the file getting corrupted. It can be a glitch in the operating system or in the program utilizing the file, improper file saving procedure, a system crash, or a result of some dangerous computer virus.

 The damage could also be on the hardware level, if the file system sector or the hard drive itself is damaged. Let's learn how to understand when a file gets corrupted and the ways to fix it.

When the file you are trying to access does not open and displays a message like 'Cannot open file' or 'File data inaccessible' then it's a clear indication that the file is corrupted.

In case the file opens but the data within is unreadable, i.e., showing signs and symbols other than normal alphabets and numbers, then the file is corrupted.

Fixing Corrupt Files

AVI Files
AVI (Audio Video Interleave) files are video files that run on a program application that is designed to play an .avi file. To fix such files, all you have to do is download a software that renders an AVI file correct. If the software is zipped or compressed, unzip it using a software like Winzip.

 After all the files are displayed, click on the setup file and follow the instructions to set up the software on your computer. Now, run the software, the interface window will display the functionalities that the software renders. Browse and add the corrupted AVI files and click on the button for repair. The repaired files may be stored in the same location as the previous files, or it may prompt you to select a new location.

 Different software will provide different facilities, so select one that suits your needs. Few examples of AVI file repair software are DivXRepair 1.0.1, Avi Previewer 2.27, RegCure, ASF-AVI-RM-WMV Repair, etc.


Word Files

Word files are document files that contain text data. When a word file gets corrupted, download a word file repair software to resurrect the files. Click on the software's icon and follow the instructions. Some software may need installation while others may not.
Examples of word document repair software are Repair MyWord, Nucleus Kernel Word Document Repair Software, etc. Repair MyWord can be downloaded free of cost and it provides an easy interface for the retrieval of files.


JPEG Files

JPEG is the short form of Joint Photographic Experts Group. When a .jpeg/.jpg image does not open with any default application programs like Paint, Windows Photo Gallery, Fax Viewer, etc., it is corrupt. To retrieve the image, try renaming and saving the picture file with a .jpg extension.

Another option is to use JPEG image recovery tools. Using these tools is a trial and error process, as it is difficult to figure out which one of the tools will recover the images successfully. The procedure for downloading and executing the tools is same as that mentioned above. Examples of JPEG recovery software tools are JPEG Recovery, and Picture Doctor. You can also try opening the pictures with ACDSee, or Irfanview.


Zip Files

Zip files are the compressed form of large files. Files that are very large in size are generally zipped/compacted using a compressing software, specially if they are to be sent through a mail or have to be saved on an external memory drive of low capacity.

The procedure for recovering zip files is the same, and requires a recovery software tool. Download it, follow the steps and run the application. Add the zip file to be retrieved. The software will scan the zip file and show you the result. Select from the files the ones you want to repair and go to the next step. Software examples for fixing zip files are Zip Repair Software 1.0, Zip Repair Tool 3.3, and Actual Zip Repair 2.1.


Files on PSP

First and foremost, check if the file you are trying to open in your PSP (PlayStation Portable) is compatible with the PSP file format or not. If your PSP does not support the file format, you may have to convert the file to the file format supported by your PSP.

A direct method to repair the corrupted file is to connect the PSP to the computer and run the data recovery software on your PC. Include the files on the PSP in the recovery software and retrieve them. If that is not possible, put the corrupted files back on your computer, recover the files using a recovery tool for that file format and put it back on the PSP.

Some of the data recovery software may not be available free of cost. If they are not freeware then you can download a trial or demo version to repair your files. Also, remember that a software that works for someone else may not necessarily work for you.

 Hence, you may have to employ the trial and error method to check the validity of the software. In case of a virus, you may need to run an antivirus software, after which the corrupted files may open. In case of hardware failure, hard drive data recovery is also possible.

Trick on How to Retrieve a Deleted Files from Recycle Bin

Sometimes, extremely important files on your computer get deleted by mistake, or sometimes, you delete them and later wish that you hadn't. The common thing in both cases is that you want to know how to retrieve them from recycle bin?      The answer to this question depends upon how long it has been since you deleted them. If it has been only a few hours or a couple of days, the answer is very easy. But, if you have done it months back, then it's a little difficult. The following paragraphs will provide you with some tips on recovering permanently erased items.   The Truth About Deleted Files   When you simply delete a file using the delete option from the right click menu, it goes to the recycle bin. You can easily recover this item using the restore option. When you delete a file from the recycle bin, or when you shift+delete it, the same process happens as in the case of deletion to the bin. You can restore such items just as easily, although there is a small difference between the two types.      In the later case (which we think of as permanent deletion), the reference to the deleted item, or the address by which the item is found on the hard drive, is completely erased. Also, the space that was taken up by that file is made available for reuse by new files.      If this space gets occupied by new items, it becomes impossible to retrieve the old deleted file. The point is that you can easily recover deleted items and restore lost data, even if it was done a couple of hours ago.   File Retrieval on Mac   Once you realize that you want a certain item back, make sure that you do not save anything on your computer till you have recovered it. The file deletion and retrieval process works in the same way for both MacBook and Windows. There are two ways of recovering deleted items from your Mac.      The first one is to use the timeline utility. All Macs that were manufactured after 2007 have this utility pre-installed. Using this utility is very easy; just launch it and go back on the timeline where you still had the file and restore it. This is how it is recovered.      The other way to achieve the same thing is to use an external data recovery software. There are free and paid software available, which are easy to use and retrieve your files efficiently. For example: Disk Drill Basic, FileSalvage, etc.   File Retrieval on Windows   Recovering deleted items in all the versions of Windows operating system is more or less the same. Unfortunately, Windows does not have a utility such as timeline in Mac. There is a third-party program called deep freeze that reverses all the changes you made in your computer after a restart. But, this can have several disadvantages.      So, it is suggested that you use some other data recovery software program that lets you recover your items, without making any other changes on your system. Here is a small list of software, which you can use for safe file retrieval:   1.Recuva  2.Wondershare Data Recovery  3.TuneUp Utilities  4.TestDisk  5.Recover My Files  6.FileRestorePlus  7.Norton Utilities  8.Data Recovery Pro   Thus, the important thing is to avoid saving anything on your computer till you have got your deleted file back. Because if the space gets overwritten, it will become impossible to retrieve it.

Sometimes, extremely important files on your computer get deleted by mistake, or sometimes, you delete them and later wish that you hadn't. The common thing in both cases is that you want to know how to retrieve them from recycle bin?

The answer to this question depends upon how long it has been since you deleted them. If it has been only a few hours or a couple of days, the answer is very easy. But, if you have done it months back, then it's a little difficult. The following paragraphs will provide you with some tips on recovering permanently erased items.

The Truth About Deleted Files

When you simply delete a file using the delete option from the right click menu, it goes to the recycle bin. You can easily recover this item using the restore option. When you delete a file from the recycle bin, or when you shift+delete it, the same process happens as in the case of deletion to the bin. You can restore such items just as easily, although there is a small difference between the two types.

 In the later case (which we think of as permanent deletion), the reference to the deleted item, or the address by which the item is found on the hard drive, is completely erased. Also, the space that was taken up by that file is made available for reuse by new files.

If this space gets occupied by new items, it becomes impossible to retrieve the old deleted file. The point is that you can easily recover deleted items and restore lost data, even if it was done a couple of hours ago.

File Retrieval on Mac

Once you realize that you want a certain item back, make sure that you do not save anything on your computer till you have recovered it. The file deletion and retrieval process works in the same way for both MacBook and Windows. There are two ways of recovering deleted items from your Mac.

 The first one is to use the timeline utility. All Macs that were manufactured after 2007 have this utility pre-installed. Using this utility is very easy; just launch it and go back on the timeline where you still had the file and restore it. This is how it is recovered.

 The other way to achieve the same thing is to use an external data recovery software. There are free and paid software available, which are easy to use and retrieve your files efficiently. For example: Disk Drill Basic, FileSalvage, etc.

File Retrieval on Windows

Recovering deleted items in all the versions of Windows operating system is more or less the same. Unfortunately, Windows does not have a utility such as timeline in Mac. There is a third-party program called deep freeze that reverses all the changes you made in your computer after a restart. But, this can have several disadvantages.

So, it is suggested that you use some other data recovery software program that lets you recover your items, without making any other changes on your system. Here is a small list of software, which you can use for safe file retrieval:

1.Recuva
2.Wondershare Data Recovery
3.TuneUp Utilities
4.TestDisk
5.Recover My Files
6.FileRestorePlus
7.Norton Utilities
8.Data Recovery Pro

Thus, the important thing is to avoid saving anything on your computer till you have got your deleted file back. Because if the space gets overwritten, it will become impossible to retrieve it.

Saturday, May 30, 2015

6 Ways to Increase Download Speed in your pc

1.Running Programs     Shut down all the programs and applications that are running in the background, while you are downloading. This will considerably speed up the entire process. It is also advisable to set the downloads for a particular time, when you are not working on your PC; it means that there are no programs running in the background that can slow down the speed.   2.Antivirus Software     It will carry out regular updates and security scans. While these processes are going on, the entire machine will run much slower than normal. This is something that is unavoidable, so you must ensure that your downloads and scans are not functioning at the same time.        3.Internet Connection     The first thing that you need to take into consideration is the Internet connection. If you do not have broadband Internet, then you should get it, since it is much faster than the old dial-up Internet connection. If you are already on an active cable connection, ask your Internet Service Provider (ISP) about more advanced options. The Internet speed is obviously the most vital thing; the faster it is, the better will be your download speed.   4.Prioritize Downloads     If you are downloading too many files at the same time, all of them will be running at slower speeds. You need to decide whether one type of download is more important than another, and pause the rest till the most crucial one is not completed. The more you prioritize your downloads, the faster they will be completed.   5.Download Accelerator     There are certain free software downloads available over the Internet, that are known as download accelerators. These manage the active downloads on your machine, and increase its performance during downloading process. These programs alter the way by which the machines resources are distributed, which can help you in different ways. If you are looking to increase speed in BitTorrent, a download accelerator is surely a solution for you.     6.Time of Download     Sometimes, there are more people trying to download the same file as you are, during a particular time of the day. If you find out that your download speed is immensely slow, then maybe you should just try at a different time. When there is less traffic, the download speed will be noticeably higher.


1.Running Programs

Shut down all the programs and applications that are running in the background, while you are downloading. This will considerably speed up the entire process. It is also advisable to set the downloads for a particular time, when you are not working on your PC; it means that there are no programs running in the background that can slow down the speed.

2.Antivirus Software

It will carry out regular updates and security scans. While these processes are going on, the entire machine will run much slower than normal. This is something that is unavoidable, so you must ensure that your downloads and scans are not functioning at the same time.


3.Internet Connection

The first thing that you need to take into consideration is the Internet connection. If you do not have broadband Internet, then you should get it, since it is much faster than the old dial-up Internet connection. If you are already on an active cable connection, ask your Internet Service Provider (ISP) about more advanced options. The Internet speed is obviously the most vital thing; the faster it is, the better will be your download speed.

4.Prioritize Downloads

If you are downloading too many files at the same time, all of them will be running at slower speeds. You need to decide whether one type of download is more important than another, and pause the rest till the most crucial one is not completed. The more you prioritize your downloads, the faster they will be completed.

5.Download Accelerator

There are certain free software downloads available over the Internet, that are known as download accelerators. These manage the active downloads on your machine, and increase its performance during downloading process. These programs alter the way by which the machines resources are distributed, which can help you in different ways. If you are looking to increase speed in BitTorrent, a download accelerator is surely a solution for you.

6.Time of Download

Sometimes, there are more people trying to download the same file as you are, during a particular time of the day. If you find out that your download speed is immensely slow, then maybe you should just try at a different time. When there is less traffic, the download speed will be noticeably higher.

How to delete cookies in Chrome

Although cookies are very useful to navigate the Internet,but  you are  definitely need to know the basics of removing your cookie files in your machine so you can protect your privacy when you are online.   Always there are two types of cookies which are regular text browser cookies and flash cookies. To ensure maximum web browsing privacy, you have to delete both types of cookies.   Too many Internet users delete cookies which are text-based and leave flash cookies intact. This does not  protect your privacy when you are online. You have to know how to delete flash cookies, too.   There is no one standardized way to remove cookies since different browsers clear cookies using different procedures.   This page helps you manage cookies by guiding you on how to remove cookies on the Chrome browser.   Use the steps below to clear cookies in Chrome browser.   1: At the top right side of your browser toolbar, click on the Chrome icon   2: Click on Settings   3: Scroll to the bottom and click 'Show advanced settings'   4: Under 'Privacy', you will see 'Content Settings', click on this   5: Under 'Cookies', you will see 'All cookies and site data', click on this.    Please note that you can block cookies altogether from being set on your browser by clicking 'Block sites from setting any data.' Unfortunately, many websites you browse will stop working if you do this.   It is better if you just periodically clear your cookies manually instead of preventing them from being set by your browser.   6: You will see a full listing of all your cookies. You can click REMOVE ALL to clear all your cookies or you can pick a particular website and clear your cookies from that site.


 Although cookies are very useful to navigate the Internet,but  you are  definitely need to know the basics of removing your cookie files in your machine so you can protect your privacy when you are online.


Always there are two types of cookies which are regular text browser cookies and flash cookies. To ensure maximum web browsing privacy, you have to delete both types of cookies.

Too many Internet users delete cookies which are text-based and leave flash cookies intact. This does not  protect your privacy when you are online. You have to know how to delete flash cookies, too.

There is no one standardized way to remove cookies since different browsers clear cookies using different procedures.

This page helps you manage cookies by guiding you on how to remove cookies on the Chrome browser.

Use the steps below to clear cookies in Chrome browser.

1: At the top right side of your browser toolbar, click on the Chrome icon

2: Click on Settings

3: Scroll to the bottom and click 'Show advanced settings'

4: Under 'Privacy', you will see 'Content Settings', click on this

5: Under 'Cookies', you will see 'All cookies and site data', click on this.
  Please note that you can block cookies altogether from being set on your browser by clicking 'Block sites from setting any data.' Unfortunately, many websites you browse will stop working if you do this.
 It is better if you just periodically clear your cookies manually instead of preventing them from being set by your browser.

6: You will see a full listing of all your cookies. You can click REMOVE ALL to clear all your cookies or you can pick a particular website and clear your cookies from that site.

How to Clean your Computer Registry

There are many people who think that cleaning the computer's registry is a very complicated task. Though a wrong move can have an adverse effect on the system, using a good computer registry cleaner, you can easily clean out the unusable files and speed up the computer performance.   A computer registry is a facility available on computers having Windows as their operating systems. It is a place where the most important data necessary for the computer operating system is stored.   The details of every function that is performed on the computer gets stored in it; such as a visit to a website or installing or uninstalling a program. It also houses the data of important drivers and DLL files, which are used by multiple applications. In addition, it also keeps all the data of multiple users handy.   As you keep working on your computer over time, it is obvious that you will perform number of tasks, which will cause the registry to become full with data. Even if you uninstall any software in a proper way, it will still hold some of its files.   And this is one of the main reasons why a computer runs slow. If it is messed up with disordered and unknown files, it can even result in a computer system crash. Cleaning it is the best possible method of maintaining a good boot-up and functional speed of your desktop or laptop computer.   Cleanup Process   There are some people who may advise you to get the registry cleaned manually. This can be a very risky step for the proper functioning of the computer. Fiddling with it manually can actually render your laptop or desktop computer useless. Therefore, it is very necessary that you do not delete the files yourself, but instead use a cleaning software. There may be many types of such software available in your nearby computer shop.   Before starting the process of cleaning using the appropriate software, it is suggested that you have a backup of your data on an external hard drive, in case anything goes wrong in the process. Typically, the software will scan the registry and remove all invalid files found.    However, in a majority of such software, you will be prompted an option whether you want to manually fix errors or want the software to fix it automatically. There is also a possibility that the software may delete crucial files, which are actually essential for the computer to run. Prefer manual deleting of these files as much as possible. It is recommended to use the software by referring to its guidelines.   I hope the article will give you a gist of what you need to do to get the computer's registry cleaned.
There are many people who think that cleaning the computer's registry is a very complicated task. Though a wrong move can have an adverse effect on the system, using a good computer registry cleaner, you can easily clean out the unusable files and speed up the computer performance.

A computer registry is a facility available on computers having Windows as their operating systems. It is a place where the most important data necessary for the computer operating system is stored.

The details of every function that is performed on the computer gets stored in it; such as a visit to a website or installing or uninstalling a program. It also houses the data of important drivers and DLL files, which are used by multiple applications. In addition, it also keeps all the data of multiple users handy.

As you keep working on your computer over time, it is obvious that you will perform number of tasks, which will cause the registry to become full with data. Even if you uninstall any software in a proper way, it will still hold some of its files.

And this is one of the main reasons why a computer runs slow. If it is messed up with disordered and unknown files, it can even result in a computer system crash. Cleaning it is the best possible method of maintaining a good boot-up and functional speed of your desktop or laptop computer.

Cleanup Process

There are some people who may advise you to get the registry cleaned manually. This can be a very risky step for the proper functioning of the computer. Fiddling with it manually can actually render your laptop or desktop computer useless. Therefore, it is very necessary that you do not delete the files yourself, but instead use a cleaning software. There may be many types of such software available in your nearby computer shop.

Before starting the process of cleaning using the appropriate software, it is suggested that you have a backup of your data on an external hard drive, in case anything goes wrong in the process. Typically, the software will scan the registry and remove all invalid files found.

 However, in a majority of such software, you will be prompted an option whether you want to manually fix errors or want the software to fix it automatically. There is also a possibility that the software may delete crucial files, which are actually essential for the computer to run. Prefer manual deleting of these files as much as possible. It is recommended to use the software by referring to its guidelines.

I hope the article will give you a gist of what you need to do to get the computer's registry cleaned.

Computer Hardware Repair and Maintenance tip.!!

What computer hardware is? Hardware components like the monitor, keyboard, CPU , mouse, and other I/O (Input-Output) devices constitute a computer.    The working of the monitor, keyboard, mouse, and I/O devices depends largely upon the CPU. Due to some minor causes, like loose connections or dust saturation, any of them can stop functioning.   Faults occurring in the CPU are most hazardous, as it has a very complicated structure. The CPU is an assembly of the motherboard, hard disk drive (HDD), random access memory (RAM), compact disc-read only memory (CD-ROM) drive, and the floppy drive.   Unless you are well-acquainted with the CPU hardware, it is extremely difficult to pinpoint exactly where the fault has occurred. If any one of these components fail to perform, there are a few repair tips that can be followed. In order to view the circuitry inside the CPU, its casing has to be removed.   1.Motherboard    The entire functioning of the computer depends on this component. The processor chipset, that performs all the logical operations of the PC, is embedded in the motherboard. Ribbon cables, power supply, CPU, and RAM are the things to be checked first on the motherboard. Check if any of the ribbon cables or the power supply cord is loose.   Check if the RAM chip has been misplaced from its slot. The CPU  will not show any marks on the outside if it is blown. The only way to check whether the CPU is working or not, is to test it by mounting it on the motherboard of another PC.   The motherboard has a real-time clock, ROM BIOS, CMOS RAM, RAM sockets, CPU sockets or slots, cache RAM slots, keyboard controller, interrupts, internal connectors, and external connectors mounted on it.    Do not tamper with these components, unless you know each and every one of it well. Do not touch the motherboard without turning off the power.   2.Hard Disk Drive (HDD)   Also known as hard drive, it is the long-term storage device of the system. If the hard drive cannot be detected, check the jumper setting. The jumper setting can change the mode of the hard disk from master to slave or vice-versa.    Make sure the Windows version being used for partitioning is consistent. Check that each drive has been assigned a drive-type. Make sure the pin numbers of the plug are attached to the corresponding pin numbers of the socket.   Do not force the plug into the socket with extra force, the pins may bend. If the plug is not fitting perfectly in the socket, try inserting it again by flipping it over. Do not attempt to open the hard drive without enough knowledge of its components.   3.Compact Disc-Read Only Memory (CD-ROM) Drive   Data stored on external storage device like compact discs (CD) is read by inserting the CD in the CD drive. If the CD drive is not functioning, check if the CD is scratched. If the CD works fine in another PC, check if the power cable of the former drive is loose.    Check if the plug and socket pin numbers match. If the tray of the drive is not opening, right click on CD-ROM icon and select eject option. If the tray does not open, insert a straight thin metal pin into the edge and try to pull it open.   Do not apply too much of force while doing so. Avoid connecting the CD-ROM drive on the same controller cable as the primary hard drive, this will slow down its performance.   4.Random Access Memory (RAM)   It is the temporary memory of the PC. The data in the RAM is erased when the computer is shut down. Check if the RAM is misplaced from its slot. While replacing the RAM in its slot, check the small niche at the center of the chip (the niche indicates how the RAM is supposed to be placed in the slot and may not be at the exact mid position of the chip-strip).   Do not forget to secure the side clips that hold the chip in place. If you are unable to secure them, it means that the chip is not placed correctly in the slot.     5.Floppy Drive   If the floppy disk is not opening, try opening it in the floppy drive of another PC. If the disk does not open, then it is probably corrupt. If the disk is stuck in the drive, hold down the eject button for sometime or right click on floppy drive icon and select eject option.   If the disk is still stuck, wiggle it up and down till it can be ejected or use tweezers to pull it out. Do not apply too much of force while doing so.    The CPU is the brain of the computer. Proper maintenance of the CPU, as well as all other components, enhances the computer performance.

What computer hardware is? Hardware components like the monitor, keyboard, CPU , mouse, and other I/O (Input-Output) devices constitute a computer.

 The working of the monitor, keyboard, mouse, and I/O devices depends largely upon the CPU. Due to some minor causes, like loose connections or dust saturation, any of them can stop functioning.

Faults occurring in the CPU are most hazardous, as it has a very complicated structure. The CPU is an assembly of the motherboard, hard disk drive (HDD), random access memory (RAM), compact disc-read only memory (CD-ROM) drive, and the floppy drive.

Unless you are well-acquainted with the CPU hardware, it is extremely difficult to pinpoint exactly where the fault has occurred. If any one of these components fail to perform, there are a few repair tips that can be followed. In order to view the circuitry inside the CPU, its casing has to be removed.

1.Motherboard 

The entire functioning of the computer depends on this component. The processor chipset, that performs all the logical operations of the PC, is embedded in the motherboard. Ribbon cables, power supply, CPU, and RAM are the things to be checked first on the motherboard. Check if any of the ribbon cables or the power supply cord is loose.

Check if the RAM chip has been misplaced from its slot. The CPU  will not show any marks on the outside if it is blown. The only way to check whether the CPU is working or not, is to test it by mounting it on the motherboard of another PC.

The motherboard has a real-time clock, ROM BIOS, CMOS RAM, RAM sockets, CPU sockets or slots, cache RAM slots, keyboard controller, interrupts, internal connectors, and external connectors mounted on it.

 Do not tamper with these components, unless you know each and every one of it well. Do not touch the motherboard without turning off the power.

2.Hard Disk Drive (HDD)

Also known as hard drive, it is the long-term storage device of the system. If the hard drive cannot be detected, check the jumper setting. The jumper setting can change the mode of the hard disk from master to slave or vice-versa.

 Make sure the Windows version being used for partitioning is consistent. Check that each drive has been assigned a drive-type. Make sure the pin numbers of the plug are attached to the corresponding pin numbers of the socket.

Do not force the plug into the socket with extra force, the pins may bend. If the plug is not fitting perfectly in the socket, try inserting it again by flipping it over. Do not attempt to open the hard drive without enough knowledge of its components.

3.Compact Disc-Read Only Memory (CD-ROM) Drive

Data stored on external storage device like compact discs (CD) is read by inserting the CD in the CD drive. If the CD drive is not functioning, check if the CD is scratched. If the CD works fine in another PC, check if the power cable of the former drive is loose.

 Check if the plug and socket pin numbers match. If the tray of the drive is not opening, right click on CD-ROM icon and select eject option. If the tray does not open, insert a straight thin metal pin into the edge and try to pull it open.

Do not apply too much of force while doing so. Avoid connecting the CD-ROM drive on the same controller cable as the primary hard drive, this will slow down its performance.

4.Random Access Memory (RAM)

It is the temporary memory of the PC. The data in the RAM is erased when the computer is shut down. Check if the RAM is misplaced from its slot. While replacing the RAM in its slot, check the small niche at the center of the chip (the niche indicates how the RAM is supposed to be placed in the slot and may not be at the exact mid position of the chip-strip).

Do not forget to secure the side clips that hold the chip in place. If you are unable to secure them, it means that the chip is not placed correctly in the slot.


5.Floppy Drive

If the floppy disk is not opening, try opening it in the floppy drive of another PC. If the disk does not open, then it is probably corrupt. If the disk is stuck in the drive, hold down the eject button for sometime or right click on floppy drive icon and select eject option.

If the disk is still stuck, wiggle it up and down till it can be ejected or use tweezers to pull it out. Do not apply too much of force while doing so.


The CPU is the brain of the computer. Proper maintenance of the CPU, as well as all other components, enhances the computer performance.
 

ONE TECHNO Copyright © 2012 Fast Loading -- Powered by Blogger