Warung Bebas
Showing posts with label WINDOWS 7. Show all posts

Sunday, May 31, 2015

How to Recover Deleted Files and Restore Lost Data in your computer.!!!

Computers are an integral part of our life today. A few years ago, computers were rarely treated as a dependable tool for business purposes. However, with the advent of paperless offices today, most documents are available only in e-formats. Therefore, data backup has become a necessity and is a must for computers used for professional as well as personal needs.   Data and files can be deleted from the computer for a varied number of reasons. Sometimes, important data may be deleted accidentally. This is when one tries to frantically recover deleted files or restore lost data.   Even if you have just deleted some files in the middle of the night accidentally, there is some hope. First off, if you have just deleted the file, you can always go to the Recycle Bin, select the file you need and then click 'Restore The File' from the toolbar.   This process is also known as 'undelete' in computer lingo. However, if you have deleted the file from the computer as well as emptied the recycle bin, you will have to depend on professional help to salvage your data.   One of the best options to secure and, therefore, restore your data is to keep a backup of your data on another computer or drive. You can also have your entire data written or burned on a CD or DVD. Today, there are portable data devices like portable hard disks, pen drives, and some MP3 players which double up as a portable hard disk. Therefore, it isn't necessary to have a whole computer system to have a backup of your system.   If you have not made a backup of your system in a long time, nor have prepared a CD of your important data, you still have options to restore lost data from your PC. There are various software available in the market which can restore your data. Though expensive, the day these software recover your data, they will be worth their cost in gold doubloons.   Such software is known as undelete software for windows, and these can recover data from almost any data drive like hard disks, pen drives, USB drives, and zip drives. They can even recover data from data cards in digital cameras and cell phones.   The software can recover files deleted and emptied from the Recycle Bin, files deleted using MSDOS commands, as well as data you have accidentally deleted using the Shift+Delete command. It also restores data lost during the 'Cut' 'Copy' or 'Move' command. More importantly, the software even restores data lost due to viruses.   Like all software, one can find various trial versions of such undelete software on the internet. You can use it for a while and judge whether it is perfect for your needs. Other than that, you can browse the Internet and find more about the features and details of the software, and decide which one suits your needs the best.   Undelete software isn't just necessary or important for professional users of the computers. It is the need of the day for everyone using a computer. Data loss can mean loss of all saved games for the gamer, the loss of the month's budget workout for the homemaker, or even the loss of a month's work for a work-at-home person.   Such software is economical and logical as compared to running to the computer guys once you have accidentally deleted data from your computer.
Computers are an integral part of our life today. A few years ago, computers were rarely treated as a dependable tool for business purposes. However, with the advent of paperless offices today, most documents are available only in e-formats. Therefore, data backup has become a necessity and is a must for computers used for professional as well as personal needs.

Data and files can be deleted from the computer for a varied number of reasons. Sometimes, important data may be deleted accidentally. This is when one tries to frantically recover deleted files or restore lost data.

Even if you have just deleted some files in the middle of the night accidentally, there is some hope. First off, if you have just deleted the file, you can always go to the Recycle Bin, select the file you need and then click 'Restore The File' from the toolbar.

This process is also known as 'undelete' in computer lingo. However, if you have deleted the file from the computer as well as emptied the recycle bin, you will have to depend on professional help to salvage your data.

One of the best options to secure and, therefore, restore your data is to keep a backup of your data on another computer or drive. You can also have your entire data written or burned on a CD or DVD. Today, there are portable data devices like portable hard disks, pen drives, and some MP3 players which double up as a portable hard disk. Therefore, it isn't necessary to have a whole computer system to have a backup of your system.

If you have not made a backup of your system in a long time, nor have prepared a CD of your important data, you still have options to restore lost data from your PC. There are various software available in the market which can restore your data. Though expensive, the day these software recover your data, they will be worth their cost in gold doubloons.

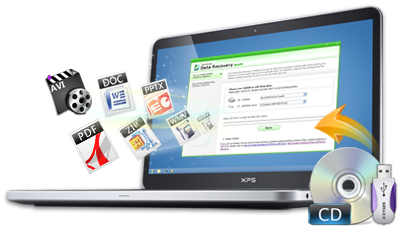
Such software is known as undelete software for windows, and these can recover data from almost any data drive like hard disks, pen drives, USB drives, and zip drives. They can even recover data from data cards in digital cameras and cell phones.

The software can recover files deleted and emptied from the Recycle Bin, files deleted using MSDOS commands, as well as data you have accidentally deleted using the Shift+Delete command. It also restores data lost during the 'Cut' 'Copy' or 'Move' command. More importantly, the software even restores data lost due to viruses.

Like all software, one can find various trial versions of such undelete software on the internet. You can use it for a while and judge whether it is perfect for your needs. Other than that, you can browse the Internet and find more about the features and details of the software, and decide which one suits your needs the best.

Undelete software isn't just necessary or important for professional users of the computers. It is the need of the day for everyone using a computer. Data loss can mean loss of all saved games for the gamer, the loss of the month's budget workout for the homemaker, or even the loss of a month's work for a work-at-home person.

Such software is economical and logical as compared to running to the computer guys once you have accidentally deleted data from your computer.


Sunday, July 6, 2014

6 Ways to Increase Download Speed in your machine..!!

6 Ways to Increase Download Speed in your machine..!!

1. INTERNET CONNECTION
The first thing that you need to know is the Internet connection. If you do not have broadband Internet  then you should get it since it is much faster than the old dial-up Internet connection. If you are already on an active cable connection you may ask your Internet Service Provider (ISP) about more advanced options. The Internet speed is obviously the most vital thing; the faster it is, the better will be your download speed.

2. ANTIVIRUS SOFTWARE
It will carry out regular updates and a security scans to protect your machine. While these processes are going on the entire machine will run much slower than normal. This is something that is unavoidable, so you must ensure that your downloads and scans are not functioning at the same time.

3. SELECT FIRST FILE TO DOWNLOAD AMONG OTHERS
If you are downloading a lot of files at the same time, all of them will be running at slower speeds. all you need is to decide which one type of download is more important than another  and pause the rest till the most crucial one is completed. The more you prioritize your downloads, the faster they will be completed.

4. DIFFERENT RUNNING PROGRAM
Shut down all the programs and applications that are running in the background while you are downloading. This will considerably speed up the entire process. It is also advisable to set the downloads for a particular time, when you are not working on your machine; it means that there are no programs running in the background that can slow down the speed.

5. DOWNLOADING TIME
Sometimes there are more people trying to download the same file as you are, during a particular time of the day. If you find out that your download speed is slow down, then maybe you should just try at a different time. When there is less traffic, the download speed will be  higher.

6. DOWNLOAD ACCELERATOR
There are different free software downloads available over the Internet which are known as download accelerators. These manage the active downloads on your machine and also increase its performance during downloading process. These programs alter the way by which the machines resources are distributed which can help you in different ways.

Saturday, June 21, 2014

How to Make Icons Display More Quickly on the Taskbar ..!!

How to Make Icons Display More Quickly on the Taskbar ..!!
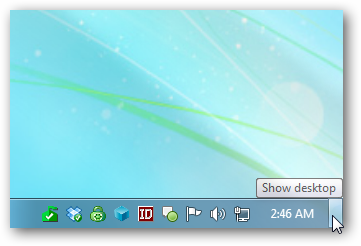
The task bar provides a simple shortcuts to most used items and allowing user to simply click on an icon and open the associated program. When you hover your mouse over an icon, you can easily see what that icon is and what it does.

Unfortunately  those descriptions can be slow to appear sometimes and that can reduce your productivity and increase the amount of time it takes to open your programs. If you are having this kind of problem  you can tweak Windows 7 to make those thumbnail descriptions display much more quickly. Just follow these simple steps to make the taskbar easy and more useful.

Click Start button and type regedit in the Search box. This will open the Windows Registry. NOTE THAT:: you should always back up the registry before you make any changes.

Navigate the registry and go to the HKEY_CURRENT_USER\Control Panel\Mouse section Highlight the Mouse Hover Time setting and double-click it.

Lower the number in the box to display the thumbnails easily and more quickly. The default setting is 400 milliseconds, but also you can choose any number you wish – 150 milliseconds is a good one.

After you are done making the change  simply click the red X to close the registry editor and see the results of your tweak.

How to Format Your Hard Drive in Windows 7/ WINDOWS 7

How to Format Your Hard Drive in Windows 7/ WINDOWS 7

If you are running Windows 7 and you need to format the hard drive that it is installed on You need to follow these simple steps below you should know that formatting your hard drive you will delete all of the files, folders and other documents or programs that are installed, NOTE THAT:: its batter to back up all your system before you start the process.

STEPS TO FOLLOW

Open the Windows 7 Disk Management Utility and locate the drive in which you want to format. If you do not see your hard drive listed in the box or you get an Initialize Disk window you most likely have not partitioned the hard drive yet.

You will need to partition the hard drive before you will be able to continue, so if you get this message, partition the drive then come back to the next step once completed.

With the drive located that is to be formatted, right click and select Format

Be sure you have the correct drive selected before you start the formatting process once it begins there is no way to retrieve the information.


In the Volume Label you will need to assign your drive a name by default Windows 7 will name the drive New Volume If you are using this drive for something specific such as movies or animation files name it easy name to remember

Click NTSF for the file system

Set your Allocation unit size to Default unless you have a specific reason to customize it.

Uncheck the perform a quick format in order to do a standard full format.

Be sure that the Enable file and folder compression box is unchecked.

Click Ok at the bottom of the window then Ok again to begin the formatting process.

The formatting process can take a long time depends on the size of your hard disk it take a few seconds to format a 2GB and a couple of hours to format a 2T drive.

Once the format reaches hundred percent the status change to Healthy . The hard drive once formatted completely will be ready to install with a new operating system and begin using it to store different files, folders and run programs.

How to Set Up a New Wireless connection in windows 7 / WINDOWS 7.

How  to  Set  Up a  New Wireless connection in windows 7 / WINDOWS 7.
WINDOWS 7

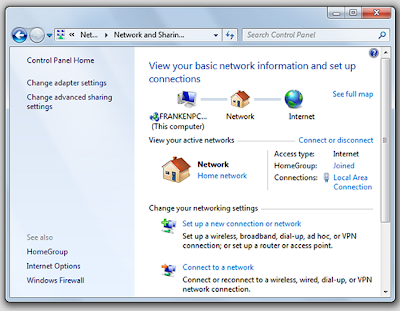
Setting up a new wireless connection on your Windows 7 laptop allows you to work from anywhere you can get a signal. That makes it easier to get things done, no matter where you need to move within your home or office.
Windows 7 makes it easy to set up a connection to an existing wireless network. Just follow the steps outlined below.
1. Click the Start button
2. Then Control Panel from the menu
3. Click Manage Wireless Networks icon and choose Add
4. Choose Manually create a network profile
5. Enter the name, security type and type of encryption for your wireless network
6. Click Next then select Change connection settings
7. Go to the Security tab and set the network authentication method used on your wireless network
8. Uncheck the box that says Remember my credentials  unless you want the laptop to retain those settings
9. Click OK to confirm your settings
When you click OK, the laptop should automatically try to connect to your wireless network. Contact the systems administrator at your workplace or the technical support number for your ISP if the network doesn't connect after a few minutes. If you are connecting through a DSL or cable modem and wireless router, you might want to power cycle both devices prior to calling for service. Resetting the modem and router often resolves problems with wireless networking.

How to Take a Screenshot With WINDOWS XP, WINDOWS 7..!! /WINDOWS TRICK

http://technologifix.blogspot.com/

Start by identifying the print screen key on your keyboard. normally located somewhere near the backspace button or function keys it will be labeled PrtScr, prt scr, PRTSCR, or PRTSCR. If your keyboard does not have a print screen button consult your laptop or mobile device manual for the appropriate key combination to capture the screen.

To take a screenshot of the entire screen  simply press the Alt+ PrtScr button. To capture an active window, press Alt + PrtScn.you should know that before you can paste or edit your screen capture you will need to save it onto Paint or any image editing program.

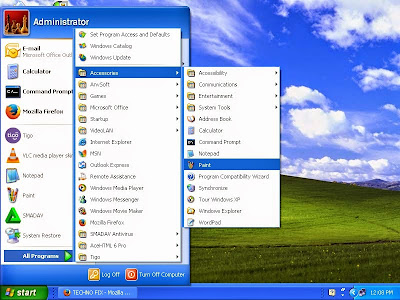
To perform this, click on the Start button in the bottom left corner of your screen. Then select All Programs and then Accessories.>>- click on Paint. This will open up your Paint program. Alternatively, you can type Paint into the search bar at the bottom of the Start menu, and then select the program when it appears.

Once Paint is open, find the Clipboard icon. From the menu you can click on Paste or Ctrl+V. This will paste the captured image onto the Paint window. From here, you can resize the image by clicking on Resize from the image group. You can enter a new pixel size or percentage from this screen. Once you have manipulated the image to a size you want, click Save to name your image
.

How to Set Up a Home Wireless Network on WINDOW 7,WINDOWS XP or WINDOW Vista


Wireless Internet has become the standard for new home networks. Advancements in networking over the past twenty years have provided the ability for more than one PC in a home to connect to the Internet at a time. Wireless networks also allow users to connect from anywhere within range of the router’s reach, giving users the luxury of surfing from their favorite spot on the couch.
Setting up a home wireless network is very easier. below are 9 steps to follow.

1. Check that your computer’s operating system supports wireless networking.
The new Windows 7 operating system comes prepared to support wireless networking. Windows Vista and Windows XP users will be able to set up a wireless network, but it is recommended that users first consult Microsoft’s homepage and download the applicable service packs in order to make the process easier. These updates should be free if you already have the operating system installed.

2. Sign up for broadband Internet service.
Many Internet service providers (ISPs) will provide wireless options such as Digital Subscriber Line (DSL) or cable internet. They are generally sold on a monthly subscription basis.

3. Purchase a wireless router, DSL modem, or cable modem.
Check with your ISP as they may provide this as part of your subscription fees.


4.Here Plug one end of a network cable into your modem to connect it to the port labeled Internet, WAN, or WLAN on your router.
Some new modem models come with networking technology built in. Make sure that the router and modem are turned off when you connect them. Once connected, turn on both devices.

5. Connect your computer to an open network port on your router.
Your computer will not stay directly connected to the router  but this step is importance in order to set up the network. Make sure that do not to plug your computer into the Internet port, WAN port or WLAN port. If your computer is turned on it should automatically recognize the router and establish a connection.

6. Enter the URL indicated in the router’s packaging to configure your router.
A lot of routers have different instructions for this configuration so follow the directions that accompany your model.

7. Establish your network name and security settings.
You can decide whether to add password to protect your connection or not.

8. Disconnect your computer from the modem.
Your wireless internet should now be correctly configured and ready to use.

9. Connect your other computers, printers and gaming systems to the network.
This should be as easy as following the device’s configuration settings and selecting your established network. Consult your device’s specific instructions, as necessary.
By following those simple steps your home wireless network will be running in any time.

Tuesday, June 3, 2014

How to Upgrade to Windows 8 From Windows 7 , XP and Vista

How to Upgrade to Windows 8 From Windows 7 , XP and Vista
After the Public Testing in 190 Countries, Microsoft’s New Operating System Windows 8 is Officially Launched. So now it’s time to Upgrade to the Next Generation Operating System Windows 8. For Using Windows 8 you can do Clean Installation of Windows 8 or Upgrade from Windows XP, Windows Vista or Windows 7 to Windows 8 .
There are Two main ways of Upgrading to Windows 8 from Windows XP, Windows Vista or Windows 7

1 Software Download In this Method we can Upgrade to Windows 8 without using Installation DVD. We can Direct Download Windows 8 Setup from Microsoft’s Website.

2 Windows 8 Installation DVD :In this Method we upgrade to Windows 8 by using the Windows 8 Installation DVD.

Windows 8 System Requirements :
• 1 GHz or faster processor
• 1 GB RAM (32-bit) or 2 GB RAM (64-bit)
• 16 GB available hard disk space (32-bit) or 20 GB (64-bit)
• DirectX 9 graphics device with WDDM 10 or higher driver.

Supported OS and Retainable Items :
•Windows 7 : Maintains Windows settings, personal files, and apps.
•Windows Vista : Maintains the Windows settings and personal files.
•Windows XP SP3 : Maintains just personal files.
Note - Before Upgrading to Windows 8 Save your all Important Data to an External Storage Device.

Method 1 Software Download
1 Go to the Microsoft Website and Find the Details for Upgrading to Windows 8 at Special Price of just $39.99 .

2 After Clicking on Download Pro for $39.99 a Pop of Windows 8 Upgrade Assistant will Appear.Save and Run Windows8-UpgradeAssistant.exe.

3 – Now Windows 8 Upgrade Assistant will run a compatibility check to Inform you about compatible items and incompatible items on your Computer for Windows 8.You can check full detail by Clicking on See compatibility details.

4 After Checking System compatibility it will ask to choose what data you want to import .If you are using Windows 7, then you could choose Windows Settings, Personal Files and Apps.But You can also Choose Nothing to import.

5 Click on Next and Place Your Order for Windows 8 Pro at Just $39.99 .

6 You can also get Windows 8 Installation DVD by Paying extra $14.99 .Click on Checkout and Make the Payment through Credit Card or Paypal and fill Necessary Details.

7 After Successfully completing your order You will get the billing Receipt and Windows 8 product Key through email.

8 Now Windows 8 Upgrade Assistant will start downloading Windows 8 to your Computer. It will take some time to download the 2 GB file, depends on your Internet Speed.

9 Once the files have been downloaded, you can Install Windows 8 Immediately by selecting Install now, or you can create a Media version of it on DVD or USB by selecting Install by creating Media.

10 Now it will inform you about the things need attention before you can continue the Installation. First Uninstall incompatible items for Windows 8 and then click on Restart to continue the Installation.

11 Now you will get last change to make any changes in settings, If you are satisfied with your settings, then Just Click on Install and your Computer will Start Upgrading to Next Generation Operating System Windows 8.

12 Done !


Method 2 Windows 8 Installation DVD
1 First Insert the Windows 8 Installation Dvd into DVR Drive or Blu-ray reader and run the setup.exe file.

2 Windows 8 Setup will Start Preparing.

3 Select Go to Online to install updates now and Click on Next.

4 Enter the Product Key and Click on Next.

5 Read and Accept the License Terms and Click on Accept.
6 – Select Setting which you want to keep during the upgrade process and Click on Next.

7 Now Microsoft will check that your system is ready for upgrade or not and inform you if any item is incompatible with Windows 8 .

8 Uninstall the incompatible items and then Click on Install to Start Upgrade.

9 Now installation process will Start, Wait for the installation process to finish. During installation process system will reboot several times.

10 Now Personalization Process begins, you can Personalize your computer in Same way we did during Clean Installation of Windows 8
That’s It The upgrade has been performed, and your files, settings, and apps have been migrated according to your settings.

READ MORE WINDOW 8 TIPS

Windows 8 keyboard shortcuts


ENJOY!!

Saturday, May 24, 2014

Windows 7 repair disc...!!!

Windows 7 repair disc...!!!
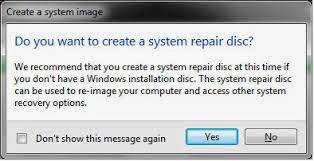
Create a Microsoft Windows 7 repair disc that can be used in the event your computer encounters errors and is not able to boot. To do this you may click Start and then in the search line type system repair and in the Start menu click the Create a System Repair Disc shortcut to start the process of creating the disc.Its simple

Friday, May 9, 2014

7 Windows 7 Secrets, Tips and Tricks you didn't know....!!!

7 Windows 7 Secrets, Tips and Tricks you didn't know....!!!
Windows 7 can possibly be ranked as the best Operation system so far because of its simplicity and user friendliness. However, if you are using Windows 7, there may be a LOT about it which you would not be knowing. Read along and APPLY what you like-

1. CHANGE THE BACKGROUND OF WINDOWS MEDIA PLAYER:
* Go to Run and type “Regedit”, This will open a registry editor.
* locate this key in registry editor
HKEY_CURRENT_USER\Software\Microsoft\MediaPlayer\P references
* Double click on the key Library Background Image and enter a value between 0 to *{each number represents a background}.

2. MOVE OPEN WINDOWS
If you press windows logo key + arrow key, then you will see the hover window is moving in the different sides according to the pressed arrow key. you can also minimize your opened hover window by pressing windows logo key + two times down arrow key.

3ACCESS HIDDEN THEMES
Windows 7 does not come bundled with a lot set of themes with it, so here is a simple windows 7 trick by which we can use windows 7 themes which aren’t made for us.
Just type C:\Windows\Globalization\MCT in the search box and press enter. You will see some folders of themes which are made for other countries like USA and Canada.

4. INSTALL WINDOWS 7 ON NETBOOK WITH A PENDRIVE OR FLASH DRIVE
To install windows 7 on a net book with a pen drive, Take a 4GB pen drive and format it with FAT32 file system, Then just copy an ISO image to the pen drive by x copy d:\ e:\ /d /e where d: is the DVD drive which contains windows CD in it and e: is the pen drive locatioN . It will create a bootable pendrive by which you can easily install windows 7 on netbook.

5. MAKE A SYSTEM REPAIR DISC
Almost all versions of windows supports this handy feature, making system repair disc is helpful in situations when we are facing any problems booting windows.
System repair disc restore the windows to an old state without affecting your hard disk data. To create a system repair disc go to start, then maintenance and then create a system repair disc.

6. NEW WINDOWS 7 CALCULATOR
New windows 7 calculator looks like vista one, but if you look it closely then you will find a lot of advance modes like standard, scientific, programmer and statistics. These modes support thousands of operations to solve a complex problem. To activate any of the mode just click on view and select mode.

7. BURN CD AND DVDS WITH WINDOW 7 BUILT IN BURNER
Windows 7 provides its own burner to burn cd’s and Dvd’s, So we do not need to download software like NERO to burn ISO. To burn an ISO file, Right click on the ISO file and select Burn Disc image, or easier just double click the ISO file .

Wednesday, March 19, 2014

BOOST YOUR INTERNET SPEED WITHOUT SOFTWARE

Though this method you may increase your internet speed up to 20% more.
Uses of Reserved Bandwidth
1. Windows Automatic Updates rely on this reserved bandwidth.
2. Fast loading Microsoft Websites
3. Sending Error Reports
4. Online Help support in Microsoft Office

But this can be recovered back...

The Remedy
1. Start >> Run
2. Type gpedit.msc
3. This opens the Policy Editor
4. Now, Local Computer Policy => Computer Configuration
5. Then, Administrative Templates => Network
6. Now, click on QOS Packet Scheduler
 7.Now, on Right hand side
8. Double Click Limit reservable bandwidth
9. Now in Setting Tab

 NOTE THAT
It says : Not Configured
Reality : The Explain Tab says "By default, the Packet Scheduler limits the system to 20 percent of the bandwidth of a connection"


> So, on Setting Tab select Enabled
>Now, change Bandwidth limit (%) to 0 (Zero)

 NOTE THAT
Misconception : This don't means that you won't be able to communicate with Microsoft or any its services
Actually : This reserved Bandwidth is only to accelerate Microsoft internet connections more than other connections


Click OK

Tuesday, March 18, 2014

HOW TO SWITCH THE CONTROL PANEL TO CLASSIC VIEW

First of all click on the START bottom on the lower left corner in your computer and then click on the CONTROL PANEL on the right hand side of the main menu that pops up,When the window opens click on SWITCH TO VIEW CLASSIC in the left column of the same window in your computer. 
 

ONE TECHNO Copyright © 2012 Fast Loading -- Powered by Blogger