Friday, September 19, 2014
how to solve and fix Samsung Galaxy S5 Audio problem
Posted by
Admin
at
1:32 AM
Many users have complained of several problems with audio / speaker and microphone of Samsung Galaxy S5. Sometimes the caller cannot hear the other person and sometimes the other person cannot hear the caller. Sometimes the audio is not audible.
Trick on how to solve and fix this problem:
- Clear the cache and close any running active application. Also clear the RAM.
- Make sure the audio volume is maximum.
- Restart the phone if required.
- If the problem is not solved then remove the battery and the SIM and again insert them back and turn ON the Cell Phone.
- Make sure no external Bluetooth device is paired with the phone. Turn OFF Bluetooth.
- If the other person can not hear you then check the microphone. Make sure there is nothing caught in the microphone hole. Use the compressed air pressure to clean the hole.
Samsung Galaxy S5 Screen Problem – The screen does not turn on.
Posted by
Admin
at
1:01 AM
Many buyers and users of Samsung Galaxy S5 mobile cell phone are complaining about its screen problem. In many cases, the screen doesn’t not turn ON Automatically when the phone is on STANDBY MODE for some time. The screen just remains black.
Procedures on how to solve and fix this problem:
- Restart the phone or Turn it OFF and and after few second Turn it ON.
- If the problem is not fixed then remove the battery and again insert it back.
- You may also have to change the Lock Screen Setting. Just go to Settings and select Device. Select the Lock Screen Option and then select Additional Information. Uncheck and turn OFF the setting.
- If the problem is still not solved then you may have to Disable the “S Health App and the Smart Remote App. Go to 1– Settings 2– Accessibility 3– Vision 4– Dark screen 5– Turn OFF.
- Buggy applications can also cause the problem. Check and uninstall.
Go to
1. Settings
2 – Backup and reset
3- Factory data reset.
After Factory Reset your Samsung Galaxy S5 mobile cell phone problem will be fixed up to 99%
Sony Xperia Z2 Problem and Solution
Posted by
Admin
at
12:27 AM
Sony Xperia Z2 is among the top most selling smartphone around the world. The cell phone is often compared with Sony Xperia Z1, Sony Xperia Z3, Samsung Galaxy S5 and Apple iPhone 6.
Recently many Sony Xperia Z2 owners have been complaining about several hardware and software problems. Most common problems and issues with the Sony Xperia Z2 smartphone are listed below:
- Overheating Problem.
- Speaker Problem.
- WiFi Connectivity Problem.
- USB Connectivity Problem.
- Gaps in the Handset.
- Slow Charging Problem.
- Tap to Wake Problem.
- Call and Notification Volume Problem
Sony Xperia Z2 Overheating Problem and Solution
- The overheating problem occurs mainly during 4K video recording.
- Try to use a high capacity external SD card.Sony Xperia Z2 phone supports up to 128 GB.
- Change settings to save videos in the external storage. Do not shoot 4K videos for long time just shoot for very short of time.
- Try to avoid using image intensive apps that may lead to several overheating.
- Do not open too many applications at the same time and aslo close all applications running at the background.
- Also updating software may fix the issue Go to.
- 1. Settings
- 2. About phone
- 3. Software updates
- 4. System updates.
Sony Xperia Z2 Speaker Problem and Solution
- Check and remove and external elements such as paper.
- Check volume level. Make sure it is set to maximum.
- Go To 1. Settings 2. Sound 3. Change your ringtone or notification sounds.
- Go To 1. Settings 2. Sound 3. Sound effects 4. Sound enhancements 5. Settings 6. Switch ON xLoud.
Sony Xperia Z2 WiFi Connectivity Problem and Solution
- Reboot both your phone and check if the problem is solved.
- Check out if the latest version of firmware is installed in the phone. Go to 1. Settings 2. about phone 3. Software updates 4. System updates.
- Go to Settings 1. Wi-Fi 2. Press option button / icon 3. Tap Advanced 4. Tap Keep Wi-Fi on during sleep 5. Select always.
- Make sure you are within reasonable range from the WiFi router and remove any protective case from your phone. Remove the phone from docks or stand to see if the Wi-Fi signal strength improves.
- Make sure potential interfering devices or appliances are not placed close to the Wi-Fi router.
- Make sure that your password is correct and that it does not contain any special characters.
- Set the IP manually. Go To 1. Settings 2. Wi-Fi 3. Tap and hold the network you are connecting to 4. Select Modify network 5. Tick the Show advanced options box 6. Select Static under IP settings 7. Save.
- If none of the above tips help, try to connect to another network to see if it works.
- Turn OFF battery saving mode and see if the problem is fixed.
- Reset the phone to factory settings.
Sony Xperia Z2 Slow Battery Charging Problem and Solution
- Check out the charger cable for any fault. Use another charger and check.
- Always use the original charger.Using third-party chargers can cause problems.
- Make sure the charger is connected properly
- Check out the charging speed using USB.
Sony Xperia Z2 Tap to Wake Problem and Solution
- Make sure the feature is ON. Go To 1. Settings 2. Display 3. Tap to wake up.
- Double click quickly on the screen to wake the device up.
- click with your fingertip twice in exactly the same spot on the Touchscreen. It works best when the phone is on a hard surface.
Monday, September 8, 2014
Step on How to Add Favicon to your Blogger Blog
Posted by
Admin
at
7:24 AM
Branding your blog is a good thing and we as bloggers do not really concentrate on it.
One trick to brand your blog is adding a personalized Favicon to your blogger blogs.
The favicon is a 16 x 16 pixel image which is placed on tabs and address bar of web browsers.
By adding favicon you can have lots of advantage, one is that you are branding your blog,
when some user bookmarked your blog favicon will be there as a label and in browser history it is there too.
So below is a tutorial which will guide you how to add favicon to your blogger blog.
How to Add Favicon to your Blogger Blog
To add our personalized favicon first we have to make it first {design your logo first},
The best way to get a favicon is make your blog initials as a favicon.
In our blog also we have chosen “TF logo” as our favicon, but it’s entirely up to you how you want your blog favicon to be.
Favicon should be approximately 16 x 16 pixels in size to be displayed properly.
Once you have your favicon ready, log in to your blogger blog and select layout and then edit. See below pictorial representation.
By clicking on edit a pop up window will open having option to upload favicon file to your blog.
Press choose file button and locate your favicon which you have just made it and upload it to blogger.
Now click save to complete the process.
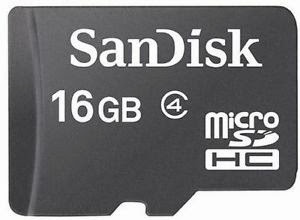
How to Unlock or Reset Micro SD Password For Nokia phone
Posted by
Admin
at
3:59 AM
Some times it happens that you forgot your Micro SD Password and you have lots of your important data in your phone.
For Nokia s60 1st and 2nd edition phones.
1. First Install FExplorer in your phone memory.
2. Got to drive C,there you will find a file called mmc store
3. Send it to your PC directly and open it in notepad or rename the file.
4. At the end of the file you will find your password.
For Nokia S60 3rd Phones, Nokia N-Series and Nokia E-Series
There is almost no way yet known to hack the memory card password in case of these types of phone but there is a way to do it some of the s60 3rd edition phones and almost all the E-series phones.
The remote lock option in E-Series phone allows you to unlock your phone by sending a sms.
The only thing you have to do is to activate this feature by going to
1-Tools
2-Settings
3-Security
4-Phone and SIM
5-Allow remote lock menu.
--The password of your memory card will be your remote lock message.
Lastly you have to send an sms containing your remote lock message that will automatically change your memory card password.
Subscribe to:
Posts (Atom)